Ever wonder how those sleek paperbacks get that clean, squared-off spine? You’re likely looking at perfect binding, but understanding its nuances is key to a successful print project. Let’s demystify it.
Perfect binding is a popular method where book pages are glued together at the spine with a strong adhesive, and a wraparound cover is attached. It’s ideal for paperbacks, softcover books, journals, and thicker magazines, offering a professional finish.
So, you’re a print buyer, maybe like my friend Michael who sources all sorts of stationery and books, and the term "perfect binding" keeps popping up. It sounds, well, perfect, right? But what does it actually involve, and is it always the perfect choice for your project? As someone who’s been in the stationery and print game for years with Panoffices, I’ve seen it all – the good, the bad, and the "oops, we should’ve known that" moments with binding. I want to walk you through what perfect binding really means, not just the definition, but the practical stuff you need to know to make smart decisions. Stick with me, and you’ll be talking binding like a pro!
What is perfect binding in printing, really?
Confused about how pages magically turn into a smooth-spined book? You’re not alone; the process is precise. Perfect binding is a widely used technique for creating that classic paperback look.
In printing, perfect binding involves collating book pages into a block, grinding the spine edge to create a rough surface for better adhesion, applying strong hot-melt glue, and then attaching a wraparound cover. The book is then trimmed for clean edges.
| Let’s break this down a bit more because seeing it in your mind’s eye helps. Imagine all your book’s pages printed, often not as single sheets but as larger sheets folded down into sections called "signatures" – say, 16 or 32 pages per signature. These signatures are then gathered in the correct order to form the "book block." Now, here’s the crucial part for perfect binding: the spine edge of this block isn’t smooth. It gets "milled" or "roughed up" – think of it like sanding wood before you glue it. This creates a much better surface for the adhesive to grab onto. Then, a strong, flexible hot-melt glue (often EVA – Ethylene Vinyl Acetate, or for super durability, PUR – Polyurethane Reactive) is applied to this roughened spine. Immediately, the pre-scored cover is wrapped around the book block and pressed firmly against that fresh glue. Once it sets, the three open sides of the book (top, bottom, and face) are trimmed to give those nice, clean, "perfect" edges. It’s a bit like a well-orchestrated dance of machinery and precision. I always tell clients at Panoffices, the quality of that spine grind and the type of glue used can make a huge difference in how long the book lasts! Here’s a simplified look at the key stages: |
Stage | Description | Why it’s key for you, the Print Buyer |
|---|---|---|---|
| Signatures | Pages printed and folded into sections. | Ensures correct page order and efficient printing. | |
| Collating | Signatures gathered in sequence to form the book block. | The heart of the book; order must be flawless. | |
| Spine Milling | Spine edge of the book block is roughened. | Critical for strong glue adhesion; prevents pages from falling out. | |
| Gluing | Hot-melt adhesive (EVA or PUR) applied to the spine. | The "binding" itself; PUR is stronger but can cost more. | |
| Covering | Scored cover is wrapped around and pressed onto the glued spine. | Creates the finished look and protects pages. | |
| Trimming | Top, bottom, and face edges are trimmed for a neat, uniform finish. | Gives the book its final, professional appearance. |
Understanding these steps helps you appreciate why certain specifications, like paper grain and spine width calculations, are so important. It’s not just about pretty pages; it’s about a structurally sound book.
What are the essential requirements for perfect binding?
Thinking perfect binding is for you, but unsure if your project fits? There are specific needs for paper, page count, and design. Getting these right avoids costly mistakes later.
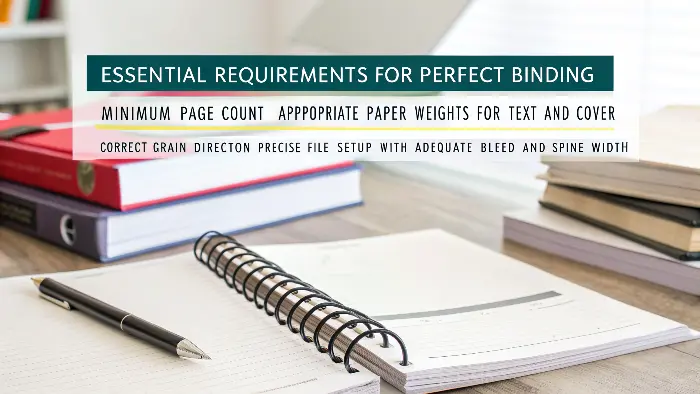
Key requirements for perfect binding include a minimum page count (or spine thickness), appropriate paper weights for both text and cover, correct grain direction, and precise file setup with adequate bleed and spine width.

Alright, so perfect binding isn’t a one-size-fits-all. There are some technical bits you, as the print buyer, need to be aware of to make sure your project runs smoothly. If these aren’t met, you might end up with a book that doesn’t look professional, or worse, falls apart! I’ve seen folks try to perfect bind super thin booklets, and it just doesn’t work well – there’s not enough spine for the glue to do its job. Conversely, extremely thick books can also pose challenges.
Let’s break down the typical requirements:
Page Count & Spine Thickness
Perfect binding generally needs a certain "bulk" to be effective.
- Minimum: Usually, you’re looking at least 32-64 pages, depending on paper thickness. A more practical measure is spine thickness – printers often specify a minimum like 1/8 inch (approx 3mm). If it’s too thin, the spine won’t be flat, and the bind might not be strong.
- Maximum: While perfect binding can handle thick books, there’s a limit, often around 2 to 2.5 inches (50-63mm) in spine width. Beyond that, the stress on the spine might be too much for a standard perfect bind, and other options (or specialized perfect binding) might be discussed.
Paper Considerations
The paper you choose for the inside pages (text block) and the cover is super important.
- Text Stock: You want a paper that’s not too flimsy (pages might tear out) but also not overly stiff or glossy, especially if using standard EVA glue, as stiff pages resist the curve of the spine and can cause "cracking" or pages to pop. Grain direction is also vital – the grain of the text pages must run parallel to the spine. This allows the pages to turn and flex easily. If it’s cross-grain, the book will be stiff, won’t open nicely, and can even warp.
- Cover Stock: The cover needs to be more substantial. It’s usually a thicker card stock, often coated on one side (C1S) or both (C2S). The grain direction of the cover should also run parallel to the spine for proper folding and to prevent cracking at the scores.
File Setup Specifics
Your digital files need to be prepped correctly.
- Bleed: Any images or colors that extend to the edge of the page must have bleed (usually 1/8 inch or 3mm beyond the trim line). This is crucial because after binding, the book is trimmed on three sides. Without bleed, you might get unsightly white edges.
-
Spine Width Calculation: The artwork for the cover is one flat piece (front cover + spine + back cover). The width of the spine element must be calculated exactly based on the number of pages and the thickness (caliper) of the text paper. Your printer will usually provide this, or a formula to calculate it. Getting this wrong means the spine content will be off-center, or the cover won’t fit. Requirement Typical Specification Why It’s Crucial for a Good Result Min. Page Count ~32-64 pages (or ~3mm spine) Ensures enough surface for glue, creates a flat spine. Max. Page Count Up to ~2-2.5 inches spine width Prevents excessive stress on the spine. Text Paper Grain Parallel to spine Allows pages to turn easily, prevents stiffness/warping. Cover Paper Grain Parallel to spine Ensures clean scores, prevents cover cracking. Bleed Min. 1/8 inch (3mm) on all trimmed edges Prevents white edges after trimming. Spine Width Precise calculation based on paper and page count Ensures cover fits correctly and spine design is centered. I always tell my clients at Panoffices, double-check these details with your printer before you finalize your design files. It saves so much back-and-forth!
How much margin should you actually leave for perfect binding?
Worried about text getting lost in the "gutter" of your book? This is a common fear. Understanding margin requirements for perfect binding is essential for readable, professional-looking pages.
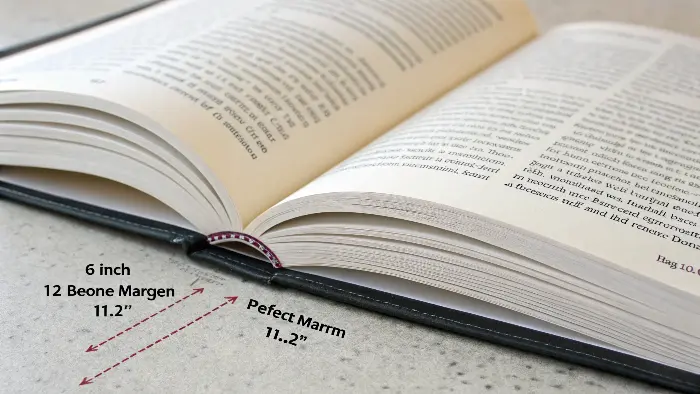
For perfect binding, you typically need a larger inside margin (gutter) than other margins, at least 1/2 inch (12.7mm), often more for thicker books, to ensure text isn’t obscured when the book is opened and due to the gluing process.

This is a question I get all the time, and it’s a super important one! You’ve designed beautiful pages, but if your text or important images creep too close to the spine, they’ll get sucked into the glued area or become hard to read without really forcing the book open – which can damage the spine. Perfect bound books don’t naturally lay flat like a spiral-bound notebook. The area where the pages are glued into the cover is called the "gutter." Because part of that inner edge is essentially lost to the binding process (the milling and gluing), you need to compensate with a generous inside margin. Think of it as a "no-go" zone for critical content.
Understanding the "Why"
- Spine Milling/Notching: Remember how the spine edge of the book block is roughened up? This process actually removes a tiny bit of paper from that edge.
- Glue Application: The glue needs to adhere to this milled edge. If your text is too close, it could literally be in the glue.
- Readability: Even if not in the glue, content too close to the gutter forces the reader to flatten the book excessively, stressing the spine and making for an uncomfortable reading experience. The natural curve of the pages into the spine will obscure part of the inner margin.
General Margin Guidelines
While your printer will give you their exact specs, here are some common recommendations:
- Inside Margin (Gutter): A minimum of 1/2 inch (12.7mm) is a good starting point. For books with higher page counts (say, over 150-200 pages), you’ll want to increase this, perhaps to 5/8 inch (16mm) or even 3/4 inch (19mm). This is because thicker books have more "creep" (inner pages of a signature push out slightly) and a more pronounced curve into the spine.
-
Outside, Top, and Bottom Margins: These can often be smaller, perhaps 3/8 inch (9.5mm) to 1/2 inch (12.7mm), depending on your design. Margin Area Minimum Recommendation Reason Inside (Gutter) 1/2" (12.7mm) to 3/4" (19mm)+ Accommodates glue, spine curve, prevents text loss, ensures readability. Outside (Face) ~3/8" (9.5mm) to 1/2" (12.7mm) Aesthetic balance, allows for comfortable holding. Top ~3/8" (9.5mm) to 1/2" (12.7mm) Aesthetic balance, space for running heads/folios. Bottom ~3/8" (9.5mm) to 1/2" (12.7mm) Aesthetic balance, space for page numbers. I once had a client, a budding author, who designed their first novel with very tight inside margins to save paper. Luckily, we caught it at the proofing stage! We had to explain that while it looked okay on their flat computer screen, a good chunk of the first and last words on each line would be unreadable in the physical book. It meant a bit of redesign, but it saved the entire print run from being a disaster. So, when in doubt, go a little bigger on that inside margin – your readers will thank you!
What are the main pros and cons of perfect binding?
Is perfect binding truly the "perfect" solution for every project? It offers a great look and feel, but it’s not without its drawbacks. Weighing these carefully is key.
Pros of perfect binding include a professional, high-end appearance with a printable square spine, cost-effectiveness for medium to high page counts, and good durability. Cons are that it doesn’t lay flat, and spine cracking can occur with use or if not produced correctly.

Okay, let’s get down to brass tacks. Like any binding method, perfect binding has its shining moments and its limitations. As a print buyer, knowing these will help you match the binding to your project’s specific needs and budget. I’ve guided many clients through this decision at Panoffices, and it often comes down to balancing aesthetics, usability, durability, and cost.
The Upsides (Pros)
- Professional Appearance: This is a big one. Perfect bound books look polished and "bookstore quality." The square spine allows for printing the title and author, making them look great on a shelf. Think novels, trade paperbacks, corporate reports, and high-quality magazines.
- Cost-Effective (for certain quantities/page counts): For books with, say, 64 pages or more, perfect binding is generally more economical than hardcover and often competitive with other methods like spiral binding, especially at higher print volumes.
- Durability (Generally Good): When done well with quality adhesives (especially PUR glue), perfect bound books are quite durable for everyday use. They can withstand a good amount of handling.
- Scalability: The process is well-suited for both medium and large print runs.
- Customizable Covers: Covers can be printed in full color, laminated (gloss, matte, soft-touch), and can even have special finishes like spot UV, embossing, or foil stamping (though these add cost).
The Downsides (Cons)
- Doesn’t Lay Flat: This is probably the most significant drawback. Perfect bound books resist opening completely flat without "breaking" the spine (creasing it). This makes them less ideal for workbooks, cookbooks, manuals, or musical scores where you need the book to stay open hands-free.
- Potential for Spine Cracking: With repeated flexing or if the paper/glue combination isn’t optimal, the spine can crack, or pages can eventually loosen, especially with less flexible EVA glues or very glossy/stiff paper. PUR glue significantly reduces this risk but can cost a bit more.
- Minimum Page Count/Thickness Required: As we discussed, it’s not suitable for very thin documents. Saddle stitching is better for those.
-
Gutter Loss: You have to account for that inside margin where content can get obscured, which can be a design constraint.
Here’s a quick comparison to help visualize:Feature Perfect Binding Alternative (e.g., Spiral) Alternative (e.g., Hardcover) Lay Flat No Yes (360 degrees) Better than perfect, not always fully flat Spine Printing Yes (Square spine) No (on coil) Yes (Square or rounded spine) Durability Good to Very Good (PUR) Fair to Good (coil can bend) Excellent Cost Moderate Moderate to High High Perceived Value Good Utilitarian to Good Very High Min. Pages ~32-64 pages ~2 pages ~64 pages I often advise clients: if your book is primarily for reading, like a novel or history book, perfect binding is often an excellent choice. But if it’s a training manual that needs to be open on a desk, or a journal for writing, we’d probably lean towards spiral or Wire-O. It’s all about the end-use! 🔥
Conclusion
Choosing perfect binding means opting for a professional look at a reasonable cost, ideal for many publications. Just remember its specific requirements and limitations for the best results.

