Stuck choosing between saddle stitching and case binding for your next print project? It’s a common dilemma! Making the wrong choice can impact your budget, timeline, and the final impression.
Saddle stitching is best for short booklets, stapling folded pages through the spine. Case binding, for durable hardcovers, involves sewing or gluing page blocks into a rigid cover—more premium, more complex.
So, you’ve got a publication ready – maybe it’s a thin promotional booklet, a company newsletter, or perhaps it’s a more substantial annual report or even a commemorative book. The content is king, sure, but how you bind it speaks volumes. I’ve seen folks like Michael, who handles product development for stationery brands, really weigh these options. He knows that the binding isn’t just functional; it’s part of the product’s DNA. With Panoffices, we’ve produced countless items using both methods, and I can tell you, choosing correctly from the start saves a world of hassle. Let’s break down saddle stitching and case binding so you can pick the winner for your specific needs.
Saddle Stitching vs. Case Binding: What’s the Core Difference for My Project?
Trying to decide if staples or a hardcover is the way to go? It’s not just about looks; it’s about function, page count, and perceived value. Let’s clarify these two distinct methods.
The core difference is construction and end-use: saddle stitching uses staples for thin, flexible booklets, while case binding creates durable, rigid hardcovers by attaching page blocks to a separately made case.
When I talk to clients, the first thing I try to understand is what their project is and what it needs to do. Imagine you’re Michael, and you need a quick, cost-effective way to produce a 24-page product catalog for a trade show. Saddle stitching is your hero. It’s fast, economical, and the booklets will lay relatively flat for easy browsing. Now, imagine Michael is also developing a premium, limited-edition brand history book. That’s where case binding shines. It screams quality, durability, and "this is something to keep."
Let’s look at the mechanics and suitability:
- Saddle Stitching Explained:
- Process: Think of it like this: sheets of paper are printed with multiple pages on them (e.g., pages 1, 2, 23, 24 on one sheet). These sheets are then folded in half, nested one inside the other in the correct order, and then "stitched" (which usually means stapled, but can sometimes involve thread for a more decorative finish) through the fold line along the spine. Typically, two staples are used.
- Page Count: It’s ideal for projects with a lower page count – usually from 8 pages up to about 64-80 pages, depending on the paper thickness. If the paper is too thick or there are too many pages, the booklet won’t close properly and will "gape" open. You also have to consider "creep" – the inner pages of a saddle-stitched booklet will stick out further than the outer pages when trimmed, and designers need to account for this.
- Best For: Magazines, newsletters, brochures, event programs, comic books, thin catalogs, direct mail pieces. Basically, items that are often for shorter-term use or where cost and quick turnaround are key.
- Case Binding Explained:
- Process: This is a more complex, multi-step process. First, the inside pages are printed, often in sections called "signatures" (e.g., 16-page sections). These signatures are then collated and either sewn together (for maximum durability – called Smyth-sewn) or, less commonly for true case binding, glued (like a perfect bound book block, but a very strong one). Separately, the "case" – the hard front cover, spine, and back cover – is made. This involves gluing a cover material (like cloth, leather, or printed paper) over rigid boards. Finally, the sewn/glued book block is attached to this case, usually with strong adhesive and often involving "endpapers" (the pages glued to the inside of the covers).
- Page Count: Generally suited for books with a higher page count, typically starting around 64 pages and going up to several hundred. It provides the necessary strength and stability for thicker volumes.
-
Best For: Hardcover novels, textbooks, coffee table books, yearbooks, reference books, high-quality journals, Bibles – anything where longevity, a premium feel, and durability are paramount. Feature Saddle Stitching Case Binding Construction Folded sheets, stapled spine Sewn/glued block, rigid hardcover Page Count Low (e.g., 8-64 pages) High (e.g., 64+ pages) Durability Lower, good for temporary use Very high, built to last Cost Low High Lays Flat? Relatively well (especially thinner) Less so, depends on spine construction Perceived Value Economical Premium, high value Turnaround Fast Slower, more complex So, for Michael’s catalog, saddle stitch is a no-brainer. For that brand history book? Case binding, all the way. It’s about matching the method to the message and the lifespan of the product.
What are the disadvantages of saddle stitch binding?
Saddle stitching is super handy, but is it always the right call? While it’s cost-effective and quick, there are definite limitations you need to be aware of before committing.
Disadvantages of saddle stitching include page count limitations (not for thick documents), less durability than other methods, potential for "creep" affecting design, and a less premium appearance compared to case or perfect binding.
I love saddle stitching for the right job – it’s a workhorse! We produce tons of saddle-stitched items at Panoffices. But it’s not a magic bullet. If I were advising Michael, and he was considering it for, say, a 100-page detailed product manual, I’d gently steer him away. Why? Because there are some real drawbacks when you push saddle stitching beyond its sweet spot.
Let’s break down these disadvantages:
- Page Count Limitation: This is the big one. As you add more pages (or use thicker paper), the booklet starts to get bulky in the middle. The staples struggle to hold it neatly, and it won’t lie flat – it’ll want to spring open. This phenomenon is often called "tenting" or "gaping." Most printers will recommend a maximum of around 64-80 pages for standard paper weights. For thicker paper, that number drops significantly. I once saw a client insist on saddle stitching a 96-page booklet on fairly heavy stock – it looked more like a wedge of cheese than a booklet! We had to reprint it using perfect binding. Oops!
- Durability Issues: Staples are strong, but they aren’t indestructible. With heavy use, pages (especially the center spread) can pull away from the staples. The cover can also tear around the staple points. It’s just not designed for long-term, heavy-duty handling like a library book.
- The "Creep" Factor (or "Shingling"): This is a bit technical but important. Because pages are nested inside each other, the inner pages of a signature will "push out" slightly further than the outer ones. When the booklet is trimmed flush after stitching, the inner pages will have a slightly narrower width than the outer pages. This is called creep. Designers need to account for this by allowing for larger inside margins on the inner pages, otherwise, content near the edge can get trimmed off or be uncomfortably close to the edge. For a 16-page booklet, it’s minor. For a 64-pager, it can be significant!
- No Printable Spine: Unlike perfect binding or case binding, there’s no flat, square spine to print a title or author on. If your booklet needs to be identifiable on a shelf, saddle stitching isn’t ideal. It just shows the folded edge.
- Perceived Value: While perfectly fine for many applications, saddle stitching generally doesn’t scream "premium" or "luxury." If you’re going for a high-end feel, other methods might be more appropriate.
So, while it’s fantastic for cost-effective, shorter documents, you need to be realistic about its limitations. It’s about choosing the right tool for the job, not forcing a tool to do something it wasn’t designed for.Is saddle stitching better than perfect binding?
Wondering if staples beat glue for your project? It’s not about "better" in an absolute sense, but which method is better suited for your specific page count, budget, and desired look.
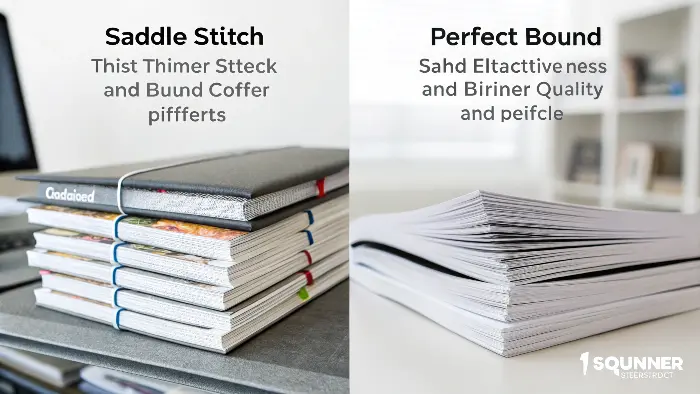
Neither is inherently "better"; they serve different needs. Saddle stitching is better for thin booklets (under ~64 pages) needing to lay flatter and be more economical. Perfect binding is better for thicker documents needing a square, printable spine and a more book-like feel.

This is a question I get a lot, especially from clients like Michael who are producing a range of items, from thin brochures to thicker journals. It’s like asking if a bicycle is better than a car – it depends on where you’re going and what you need to carry! Saddle stitching and perfect binding are both excellent… for the right applications. They really target different types of publications.
Let’s compare them directly:
- Page Count is Key:
- Saddle Stitching: Shines for low page counts. Think 8 pages up to around 64 pages (maybe 80 with thin paper). If you try to saddle stitch too many pages, it gets bulky, won’t close properly, and looks unprofessional. I’ve seen it attempted, and it’s not pretty.
- Perfect Binding: Starts where saddle stitching leaves off. You generally need a minimum spine thickness (around 1/8 inch or 3mm, which could be 48-64+ pages depending on paper) for the glue to adhere properly and create that nice square spine. It can go up to hundreds of pages.
- Lay-Flat Ability:
- Saddle Stitching: Generally lays flatter, especially for thinner booklets. This makes it good for things like workbooks (though not as flat as spiral), programs, or catalogs that people will browse.
- Perfect Binding: Does not lay flat easily. You have to "break" the spine (crease it open) to get it to stay open, which can damage it over time. Not ideal for hands-free use.
- Appearance & Spine:
- Saddle Stitching: Has a folded spine, no room for printing titles there. Looks more like a booklet or magazine.
- Perfect Binding: Offers a clean, flat, printable spine – just like a paperback novel. This is great for shelf appeal and a more "book-like" professional look.
- Durability:
- Saddle Stitching: Good for its intended use, but pages can pull from staples over time with heavy use.
- Perfect Binding: Can be very durable, especially if PUR (Polyurethane Reactive) glue is used. Standard EVA glue is good, but PUR is tougher and more flexible.
- Cost:
- Saddle Stitching: Generally more economical for lower page counts and shorter runs. The setup is simpler.
-
Perfect Binding: More cost-effective for thicker documents and often for longer runs where the per-unit setup cost is spread out. Feature Saddle Stitching Perfect Binding Ideal Pages ~8-64 (max ~80) ~48/64 – hundreds Lays Flat? Yes, relatively well No Spine Folded, not printable Square, printable Appearance Booklet/Magazine Paperback Book Durability Fair to Good Good to Excellent (with PUR glue) Cost (Low Qty) Lower Higher Cost (High Qty/Pages) Can be less economical Often more economical So, if Michael has a 20-page event program, saddle stitching is the winner. If he has a 150-page training manual, perfect binding is the way to go. It’s all about matching the binding to the beast!
What is the best binding for a booklet?
Picking the right binding for your booklet can make all the difference. You want it to look good, be easy to use, and fit your budget. So, what’s the top choice?
For most booklets (typically 8-64 pages), saddle stitching is generally the best binding method due to its cost-effectiveness, quick turnaround, and ability to lay relatively flat, making it user-friendly.

When people say "booklet," they usually mean a relatively thin publication. And for that, my go-to recommendation, nine times out of ten, is saddle stitching. I’ve produced thousands of booklets for Panoffices clients, for everything from simple price lists to small event guides, and saddle stitching consistently delivers the best bang for the buck for these types of projects.
Why is it so good for booklets?
- Cost-Effectiveness: It’s one of the most affordable binding methods, especially for shorter runs. The process is simpler and requires less setup and materials than perfect binding or case binding. If budget is a major concern for your booklet, saddle stitching is your friend.
- Lays Relatively Flat: This is a big plus for usability. Readers can open a saddle-stitched booklet and it will stay open (or nearly so) without needing to hold it down firmly. This is great for quick reference guides, instruction manuals, or anything people might need to consult while doing something else.
- Quick Turnaround: The simplicity of the process means saddle-stitched booklets can often be produced faster than those using other binding methods. If you’re on a tight deadline for an event or promotion, this can be a lifesaver.
- Lightweight: Because it’s just folded paper and a couple of staples, saddle-stitched booklets are light, which can be an advantage if you’re mailing them out (lower postage costs) or distributing them in large quantities at an event.
- Suitable for a Range of Booklet Sizes: While it has its limits, it works well for the typical A5 or A4 sized booklet, and even for custom sizes.
However, "best" always depends on the specifics.- If your "booklet" is getting thicker (say, 60+ pages, especially with heavier paper): You might need to consider perfect binding. It will handle the bulk better and give you a square spine.
- If your booklet needs to be super durable or have a premium feel: Saddle stitching might feel a bit too basic. Though, you can enhance it with thicker cover stock or special finishes.
- If your booklet needs to open completely flat for writing (like a workbook): Spiral or Wire-O binding would be better, though they are typically more expensive than saddle stitch.
Here’s a quick thought process I’d walk Michael through for a "booklet":
- Page Count: Under 64 pages and using standard paper? Saddle stitch is likely the frontrunner.
- Budget: Tight? Saddle stitch.
- Usage: Needs to be browsed easily? Saddle stitch.
- Longevity: Short-term or medium-term use? Saddle stitch is fine.
- Impression: A simple, effective informational piece? Saddle stitch.
For most standard booklets, saddle stitching hits that sweet spot of cost, usability, and speed. It’s the reliable workhorse of booklet production.Which is better saddle stitch or perfect bound magazines?
Choosing between saddle stitch and perfect binding for a magazine? This really depends on the magazine’s page count, target audience, and the image you want to project.
Saddle stitch is better for thinner magazines (e.g., under 80 pages) and those aiming for a more traditional, cost-effective feel. Perfect binding is better for thicker, premium magazines that need a square spine for shelf presence and a more book-like quality.

This is a common decision point for magazine publishers, and I’ve seen brands go both ways based on their specific needs. If Michael were launching a magazine series for Panoffices, this would be a key discussion. There’s no single "better" – it’s about what fits the publication best.
Here’s how I’d break it down for magazines:
Saddle Stitching for Magazines:
- Pros:
- Cost-Effective: Generally cheaper, especially for lower page counts and higher print volumes where the per-unit cost drops.
- Lays Flatter: Easier for readers to lay open on a table or lap.
- Faster Production: Can often be turned around more quickly.
- Traditional Feel: Many weekly or monthly general interest magazines have historically used saddle stitching.
- Cons:
- Page Count Limit: Not suitable for very thick magazines. Once you get past about 80 pages (depending on paper), it starts to look and feel unwieldy.
- No Square Spine: Can’t print the magazine title on the spine for easy identification on a newsstand or bookshelf.
- Less Perceived Value: Might not feel as "premium" as a perfect-bound magazine.
- Best Suited For: Weekly magazines, niche publications with lower page counts, free distribution magazines, literary journals with a more zine-like feel, children’s magazines. I remember as a kid, all my comic books and fun magazines were saddle-stitched!
Perfect Binding for Magazines: - Pros:
- Handles High Page Counts: Ideal for magazines with lots of content and advertising, easily handling 100, 200, or even more pages.
- Square, Printable Spine: This is huge for newsstand appeal and for subscribers who keep back issues. The spine can carry branding, issue numbers, and titles.
- Premium Look and Feel: Gives a more substantial, "book-like" quality that many readers associate with higher-end publications.
- Durability: Generally more durable for thicker issues that will be kept and referred to.
- Cons:
- More Expensive: The process is more involved, so it costs more per unit, especially for shorter runs.
- Doesn’t Lay Flat: Can be slightly more awkward to read if you like to lay your magazine completely flat.
- Best Suited For: Monthly or quarterly high-end fashion magazines, lifestyle magazines, academic journals, special interest magazines with substantial content, publications aiming for a coffee-table book feel. Think of those glossy magazines you see that are almost like thin books.
The Deciding Factors Often Boil Down To:- Page Count: This is usually the first filter. If it’s regularly over 80-100 pages, perfect binding is almost a must.
- Budget: Saddle stitching will usually win on cost for thinner publications.
- Shelf Life & Collectibility: If the magazine is meant to be kept and displayed, the printable spine of perfect binding is a big advantage.
- Brand Image: A luxury brand might opt for perfect binding even for a slightly thinner magazine to convey a premium image.
So, if Michael’s launching a quick, bi-monthly industry update of 32 pages, saddle stitch is perfect. If it’s a quarterly, 150-page design inspiration magazine, perfect binding is the clear choice. 🔥Conclusion
Saddle stitching offers economy for booklets, while case binding provides durability and a premium feel for books. Your project’s page count, budget, and desired quality will guide your best choice.

