Have you ever spent months perfecting a book design, only to have the final printed copies arrive with disappointing errors? Misaligned text, blurry images, or inconsistent colors can ruin a project and damage your brand’s reputation. Understanding the principles of print quality control is the only way to prevent these costly mistakes and ensure your vision is perfectly executed.
Spotting and preventing common book production issues involves a systematic quality control process. This includes detailed pre-press file checks, regular press maintenance, careful material selection, and post-press inspections. The most critical step is a thorough pre-press review to catch errors in bleed, resolution, and color profiles before the job ever hits the press. This proactive approach saves time, money, and protects your brand’s quality standards.

Having been in the stationery and printing business for years, I’ve seen firsthand how small oversights can lead to big problems. The difference between a successful product launch and a warehouse full of unsellable stock often comes down to the rigor of the quality control process. It’s not just about catching mistakes; it’s about building a system that prevents them from ever happening. Let’s dive into how you can build that system for your own projects.
What is quality control in printing?
The term "quality control" gets used a lot, but what does it actually mean in the context of printing? Without a clear, shared understanding of the process, you might be missing key checkpoints with your supplier. This can lead to inconsistent results, frustrating disputes, and costly reprints. Let’s break down what a truly robust quality control system in printing looks like.
Quality control (QC) in printing is a comprehensive system of checks and procedures designed to ensure that the final printed product meets a predefined set of standards. It covers every stage, from the initial digital file preparation (pre-press) to the actual printing process (on-press) and the final finishing and binding (post-press). Its goal is to maintain consistency, accuracy, and overall excellence across the entire production run.

A strong QC program is not a single action but a continuous process woven into the fabric of production. It’s about setting clear expectations from the start and then verifying them at every critical point. At our company, we think of it in three distinct phases, each with its own set of critical tasks. This structured approach ensures that nothing is left to chance. A good printing partner will be transparent about their QC process and welcome your involvement.
The Three Pillars of Print QC
A complete quality control system can be broken down into three stages. Each stage addresses different potential issues and builds upon the last to ensure a flawless final product.
| Stage | Focus Area | Key Activities |
|---|---|---|
| Pre-Press | Digital File Integrity | File pre-flight, proofing, color profile checks, plate making. |
| On-Press | Production Consistency | Color density checks, registration alignment, ink-water balance. |
| Post-Press | Finishing and Assembly | Cutting accuracy, binding strength, final inspection, packaging. |
Pre-Press QC: The Foundation
This is arguably the most important stage. It’s where we check the digital DNA of your project before it becomes a physical object. Our team runs a full pre-flight check on every file, looking for things like missing fonts, low-resolution images, and incorrect color setups. We then create a digital or physical proof for client approval. This step alone catches over 90% of potential errors.
On-Press QC: Real-Time Monitoring
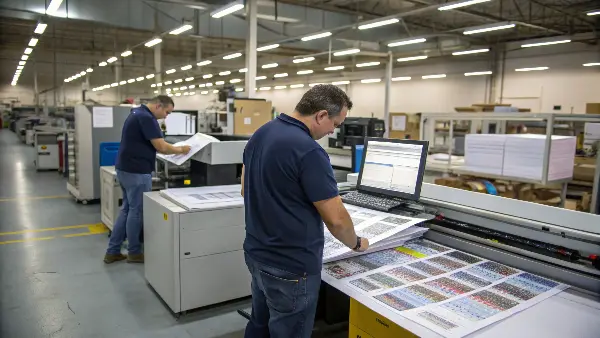
Once the plates are on the press, our skilled operators take over. They periodically pull sheets from the run to check them against the approved proof. Using tools like a densitometer, they measure ink density to ensure color stays consistent from the first sheet to the last. They also watch for perfect registration, making sure all color plates align precisely to create a sharp image.
Post-Press QC: The Final Check
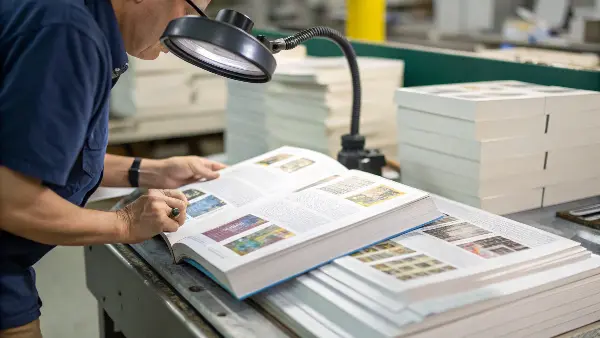
After printing, the sheets move to finishing. Here, QC involves verifying that cutting is precise, folds are accurate, and binding is secure. We inspect for any cosmetic defects like scratches or smudges before the books are finally boxed. It’s the last line of defense to ensure the product that reaches you is perfect.
What are the possible causes of a poor print quality issue?
A batch of notebooks arrives with faded colors and blurry text, and you’re left wondering what went wrong. When you’re facing a quality issue, pinpointing the exact cause can feel impossible. This makes it difficult to have a productive conversation with your supplier or prevent the same mistake from happening on your next order. Knowing the common culprits gives you the power to troubleshoot effectively.
Poor print quality often stems from issues in three main areas: the source files, the printing equipment, or the materials used. Common causes include low-resolution images, incorrect color profiles (RGB instead of CMYK), improper file setup, poorly maintained presses, variations in ink or paper batches, and environmental factors like humidity. Identifying the root cause is essential for finding the right solution.

I remember a project years ago where a client was frustrated with inconsistent blue tones across their order. After a deep dive, we discovered the issue wasn’t the press or the ink, but subtle variations in the coating of the paper stock from two different batches. This experience taught me that you have to look at every single input—the digital, the mechanical, and the physical. A problem in any one of these areas can compromise the entire project.
Digital File & Pre-Press Errors
These are issues that originate in the source artwork file. They are the most common but also the most preventable type of error. A thorough pre-press check is designed to catch them.
- Low-Resolution Images: Images for print must be at least 300 DPI (dots per inch). Using 72 DPI web images will result in a blurry or pixelated final product.
- Incorrect Color Mode: Design files must be in CMYK (Cyan, Magenta, Yellow, Black) for printing. If they are left in RGB (Red, Green, Blue), the color conversion by the printer can lead to unexpected and dull results.
- Font Issues: If fonts are not properly embedded in the PDF, they can be substituted by the printer’s system, leading to incorrect text formatting.
Mechanical & Equipment Failures
These problems happen during the printing process itself and are typically related to the press or operator skill.
| Printing Defect | Common Cause | What It Looks Like |
|---|---|---|
| Misregistration | Printing plates are not perfectly aligned. | Colors bleed outside their lines, creating a blurry or "3D" effect. |
| Ghosting | An imbalance of ink on the press rollers. | A faint, unwanted duplicate of an image appears elsewhere on the page. |
| Hickeys | Dust, paper fibers, or dried ink on the plate. | Small, a donut-shaped halo or speck appears in a solid area of color. |
Material & Environmental Variables
Sometimes the issue is not with the file or the machine, but with the raw materials or the environment.
- Paper Inconsistency: Different batches of paper can have slight variations in brightness, texture, and absorbency, which affects how ink appears.
- Ink Issues: Using the wrong type of ink for the paper (e.g., uncoated vs. coated stock) can lead to poor drying, smudging, or color shifts.
- Humidity: High humidity in the pressroom can cause paper to swell or warp, leading to registration problems and paper jams.
What is a crucial step to ensure proper print quality before initiating printing?
You’ve signed off on the design and sent the final files to your printer. Now you’re just crossing your fingers and hoping for the best. But this "hope" strategy is incredibly risky. A tiny, overlooked error in a digital file can multiply into thousands of physical mistakes, wasting an entire print run, your budget, and valuable time. There is one single step that dramatically reduces this risk.
The most crucial step to ensure proper print quality before printing is the comprehensive pre-press check. This is a detailed technical review of the final design files. Professionals meticulously examine every element—from fonts and image resolution to bleed, trim marks, and color models. This proactive inspection is your last, best chance to catch and fix errors before they become expensive physical mistakes.

Think of the pre-press check as the final quality inspection before manufacturing begins. In our business, we call this the "pre-flight" process, like a pilot’s checklist before takeoff. It is a non-negotiable step for every single job, no matter how small. It solidifies the technical specifications and creates a clear, approved standard that the production team must meet. Skipping this step is like trying to build a house without checking the blueprint first.
The Essential Pre-Press Checklist
A professional pre-press department will have a systematic checklist to review every aspect of your artwork. While the full list is extensive, it always covers these core aeras.
| Checklist Item | What We Check For | Why It Matters |
|---|---|---|
| Resolution | All images and graphics are at least 300 DPI. | Ensures a sharp, clear, and professional-looking final print without pixelation. |
| Color Mode | The entire document is set to CMYK, not RGB. | Guarantees that the colors you see on the proof will be achievable on a printing press. |
| Bleed | Artwork extends 3-5mm beyond the trim line. | Prevents unsightly white slivers on the edge of the page after the book is cut to size. |
| Safety Margin | All critical text and logos are within the safe area. | Ensures no important content is accidentally trimmed off during the finishing process. |
| Fonts & Text | All fonts are embedded or converted to outlines. | Prevents font substitution errors that can reflow text and ruin the layout. |
| Blacks | Large black areas use "Rich Black" (a mix of CMYK). | Creates a deep, saturated black instead of a washed-out gray appearance. |
The Power of the Proof
The output of a successful pre-press check is a proof. This is a sample of your project that serves as the contract for what the final product will look like. It’s your opportunity to give the final "go-ahead."
- Digital Proof (Soft Proof): This is typically a PDF that you review on your screen. It’s great for checking layout, text, and photo placement. However, because your monitor is not color-calibrated to the press, it’s not reliable for judging exact color.
- Physical Proof (Hard Proof): For color-critical projects, a physical proof is essential. It is printed on a calibrated machine that simulates the final press output. This is your best representation of the final color and is what we use as the master reference during the on-press QC checks.
How to avoid printing errors?
You now understand the common causes of print defects and the vital role of the pre-press check. But how do you integrate all this knowledge into a complete prevention strategy for your business? Simply reacting to problems as they arise is inefficient and costly. You need to build a proactive system that minimizes the chance of errors from the very start.
Avoiding printing errors requires a combination of clear communication, technical diligence, and strong supplier collaboration. This means creating a detailed print specification sheet, using pre-flight checklists for your artwork, always demanding and reviewing proofs, and choosing a printing partner who demonstrates a robust internal quality control process. A proactive partnership is the surest way to prevent mistakes before they happen.

Building a preventative system is about shifting your mindset from fixing problems to avoiding them. It requires a bit more work upfront, but it pays massive dividends in the long run by ensuring consistency, reducing stress, and building a stronger relationship with your manufacturing partners. Over the years, I’ve found that the clients who have the smoothest production runs are the ones who are most engaged in these three key areas.
Establish Clear Communication Protocols
Ambiguity is the enemy of quality. The single most effective tool for clear communication is a comprehensive Print Specification Sheet. This document should leave no room for interpretation.
- Create a Master Template: Develop a standard spec sheet for your company that you use for every project. It should include fields for every possible detail.
- Key Specifications to Include:
- Project Name & SKU:
Hardcover Notebook, Blue Linen - Quantity:
5,000 units - Dimensions:
A5 - 148 x 210mm - Page Count:
192 pages (96 sheets) - Paper Stocks:
Cover: 150gsm Art Paper over 2mm gray board. Interior: 100gsm wood-free paper. - Printing:
Cover: CMYK + Gold Foil. Interior: 1/1 color (Gray Pantone 422 U). - Binding:
Smyth-sewn, case-bound. - Finishing:
Ribbon marker (color specified), elastic band (color specified), debossed logo on cover. - Packaging:
Individually shrink-wrapped, 20 units per master carton.
- Project Name & SKU:
Standardize Your Artwork Preparation
Consistency starts with your own team. By creating and enforcing internal standards for how design files are prepared, you eliminate a huge source of potential errors before the files ever leave your office.
- Internal Checklists: Give your designers a pre-flight checklist to run before they export final files. This should mirror the printer’s own checks (300 DPI, CMYK, bleed, etc.).
- Use Templates: For recurring products like notebooks or planners, create master Adobe InDesign or Illustrator templates with all the correct margins, bleed settings, and color profiles already set up. This saves time and ensures every new design starts from a technically correct foundation.
Choose the Right Printing Partner
Ultimately, your printer is your partner in quality. You can do everything right on your end, but if your supplier doesn’t share your commitment, you will still face problems.
- Ask About Their QC Process: Don’t be afraid to ask detailed questions. How do they perform pre-press checks? Can they show you examples of their on-press checks? Do they have certifications like ISO 9001?
- Value Transparency: A good partner will be open about their capabilities and will proactively raise concerns if they see a potential issue with your file. If a supplier just says "yes" to everything without asking questions, it can be a red flag.
- Build a Relationship: The best results come from long-term partnerships built on trust and a continuous feedback loop. After each project, discuss what went well and what could be improved for next time.
Conclusion
To achieve consistent print quality, you need a multi-stage quality control system that covers pre-press, on-press, and post-press activities. Identifying potential issues early, especially during the critical pre-press check, is the most effective way to save time and money. By standardizing your processes and choosing a reliable partner, you can prevent errors and ensure every book meets your highest standards.

