Ever wonder how a stack of loose pages becomes a beautifully bound book? It seems complex! Understanding the ‘bones’ of a book can demystify publishing and improve your own projects.
Book signatures are large sheets printed with multiple pages, then folded and cut to form sections. This method streamlines printing and binding, ensuring efficiency and quality, especially for bulk orders.
This might seem a bit technical, but stick with me. It’s like when we at Panoffices plan a complex stationery set for Michael in Germany; breaking it down into manageable parts is absolutely key. You wouldn’t try to assemble a 200-piece desk organizer all at once, would you? Same idea here. Understanding signatures is pretty fundamental if you’re serious about professional publishing, or even if you’re just curious about how the books on your shelf came to be. It’s a cornerstone of the whole operation.
How do book signatures work?
Confused about how single pages magically arrange themselves into a bound book? It’s not sorcery! Book signatures are the clever, methodical trick behind it all, ensuring order and quality.
Signatures work by printing multiple book pages on one large printer’s sheet. This sheet is then precisely folded multiple times, creating a small booklet (the signature) ready for binding.
It’s actually a pretty ingenious system, and it’s been around for ages, long before modern printing presses. When Michael, from our German client, asks about optimizing print runs for, say, a new planner series for Panoffices, understanding how pages are imposed on a large sheet is crucial for cost-effective production. Imagine trying to print and collate thousands of individual A5 planner pages – what a nightmare! Instead, printers take a large sheet of paper and print multiple pages of the book onto it in a very specific arrangement. This arrangement is called an ‘imposition layout.’ For example, to create a 16-page signature, 8 pages would be printed on one side of the large sheet and 8 pages on the other, in a way that seems jumbled at first glance. But then, this sheet is folded – perhaps three times for a 16-page signature. The first fold creates 8 pages (4 on each side), the second creates 4 pages (2 on each side of that fold), and the final fold gives you a neat stack of 16 pages, all in the correct sequential order once the folded edges (bolts) are trimmed. My insights mention that signatures often contain 4, 8, 16, 32, or even 64 pages, and this all depends on the size of the printing press sheet and the desired final book size. These folded sections are the signatures, ready to be gathered with others.
How to calculate signatures for bookbinding?
Planning your book’s page count feels like a tricky puzzle sometimes, doesn’t it? Calculating signatures correctly is super vital. If you get it wrong, you could face printing headaches and unexpected extra costs.
To calculate signatures, divide your total book page count by the number of pages per signature (e.g., 16 or 32). You’ll likely need to adjust your total page count to be a multiple.

This is where the planning really comes into its own, much like when Michael specifies a certain number of pages for a custom Panoffices notebook. He knows that hitting certain page counts can optimize material use and keep costs down. To figure out the signatures for your book, you first need to know how many pages your printer will put into a single signature. As my insights highlight, this is commonly 16 or 32 pages for most books, but it can be 4, 8, or 64 pages depending on the project. Let’s say your manuscript is 150 pages long and your printer uses 16-page signatures. You’d do the math: 150 ÷ 16 = 9.375. Now, printers really don’t like partial signatures like that 0.375 – it messes up their workflow and is inefficient. So, you’d need to adjust your page count. You could either reduce it to 144 pages (9 signatures x 16 pages) or increase it to 160 pages (10 signatures x 16 pages). This might mean adding some blank pages at the front or back, an "About the Author" section, a dedication page, or perhaps some nice quotes or illustrations – things we often suggest at Panoffices to enhance a product when a specific page count is beneficial for production. Always, always chat with your printer about this early on. They can tell you their preferred signature size for your book’s trim size and paper weight.
How many signatures do you need for a book binding?
Wondering how many of these folded sections will actually make up your finished book? Too few or too many can affect the quality. The number of signatures impacts the book’s final feel and its durability.
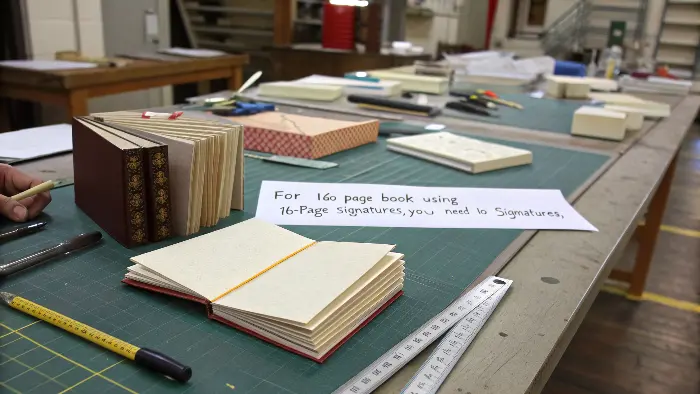
The number of signatures needed is your total page count (adjusted to be a multiple of pages-per-signature) divided by the pages per signature. For example, a 160-page book using 16-page signatures needs 10 signatures.

Once you’ve done the math and adjusted your total page count to be a nice multiple of your chosen signature size (as we just talked about), finding out the number of signatures is dead easy. It’s simple division. If your book is, let’s say, a perfectly planned 320 pages, and your printer is using 16-page signatures, then you’ll have 320 / 16 = 20 signatures. Boom! That’s your number. If you’re using 32-page signatures, it would be 320 / 32 = 10 signatures. This number is more than just a stat; it’s important for a few practical reasons. First, it tells the printer exactly how many distinct folded sections they need to print, fold, and then collate (gather in the correct order) for each copy of your book. Second, it can influence the best binding style. For instance, a book with very few signatures, like a thin children’s storybook or a marketing booklet, might be ideal for saddle-stitching. A book with many signatures, like a chunky novel or a textbook, will almost certainly be perfect bound or case bound. The thickness of each individual signature (which depends on the paper weight you’ve chosen) combined with the total number of signatures will also dictate the overall spine width of your book. This is absolutely crucial information for designing the book cover accurately. It’s a bit like when we at Panoffices are designing a new diary for Michael’s company; the number of pages directly impacts the spine, and that changes the whole cover artwork layout.
How to bind book signatures together?
So, you’ve got your stacks of perfectly printed and folded signatures, but how do they actually become a solid, readable book? Binding is that crucial final step. Without proper binding, your carefully crafted pages would just fall apart.
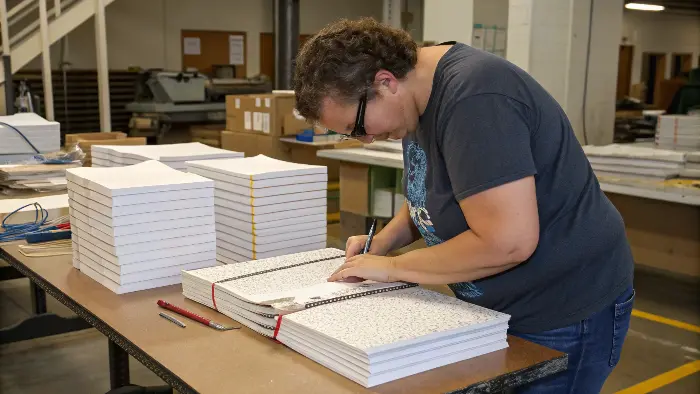
Signatures are bound by first collating them in the correct page order, then typically either sewing them (for case binding/some quality paperbacks) or gluing them at the spine (perfect binding), before the cover is attached.

Right, so your printer has produced all these neat little stacks of folded signatures. What’s next? This is where the magic of binding comes in, transforming loose sections into a cohesive book. There are several common ways to do this, and the choice often depends on the book’s thickness, intended use, and budget.
- Saddle Stitching: This is the simplest. If you have just a few signatures (or sometimes even one very large signature folded down for a thin booklet), they are opened up, nested one inside the other, and then stitched or stapled through the centerfold spine. Think magazines, comic books, or thin program guides. It’s cost-effective for low page counts.
- Perfect Binding: This is your everyday paperback. The gathered signatures have their folded spines milled off (creating a rough, flat edge). Then, a strong, flexible adhesive – ideally a more eco-friendly PUR glue if possible – is applied to this roughed spine, and the cover is wrapped around and glued on. It gives that classic flat spine.
- Smyth Sewing (or Section Sewing): This is the gold standard for durable, high-quality books, often used for hardcovers and premium paperbacks. Each individual signature is sewn through its fold with thread. Then, all these sewn signatures are sewn together to form a sturdy text block. This method allows the book to lay much flatter when open – a real bonus! Michael often asks about this for high-end Panoffices journals because it signals quality.
- Case Binding: This usually starts with a Smyth-sewn text block. The ‘case’ (the hard cover) is made separately from stiff boards and a covering material (like cloth, leatherette, or printed paper). The sewn text block is then attached to this case, often using strong endpapers that are glued to the inside of the cover and the first/last pages of the text block. This is your typical library-quality hardcover book.
My insights about signatures simplifying the printing and装订流程 (binding process), especially for大批量印刷 (large print runs), really underscore why they’re the unsung heroes of book production. Each method ensures those carefully arranged pages stay together for the reader.Conclusion
Understanding book signatures is pretty key to grasping professional publishing. They ensure efficiency in printing, quality in the final product, and are truly the foundational building blocks of almost every book you pick up.

