You want your stationery to feel luxurious and stand out. But standard printing looks flat and fails to capture that premium quality. This can make your brand seem ordinary, losing out to competitors who create a memorable tactile experience for their customers.
Specialty printing techniques like foil stamping, embossing, and debossing are the key to elevating your stationery. They add visual appeal, texture, and a perception of high value. By carefully choosing these finishes, you can create products that not only look stunning but also feel unique and luxurious in hand, making your brand instantly recognizable and desirable.
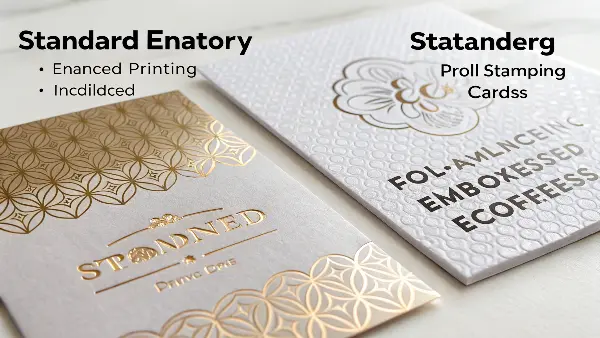
The shimmering glint of gold on a notebook cover or the raised texture of a logo is more than just decoration. It’s a signal of quality, a promise of a premium experience. But to use these effects well, you need to understand the techniques behind them. I’ve spent years helping product managers like you navigate these choices. Let’s start with the most popular one: foil stamping. Understanding how it works is the first step toward creating truly exceptional products.
What Makes Foil Stamping the Gold Standard for Premium Stationery?
You see beautiful foil designs everywhere, but you’re not sure how the magic happens. Without understanding the process, you can’t make informed decisions for your product line. This knowledge gap can lead to choosing the wrong finish or facing unexpected production challenges, costing you time and money.
Foil stamping is a premium finishing process where a heated die presses a thin layer of metallic or pigmented foil onto a surface like paper or cardstock. The heat and pressure cause the foil to release from its backing and adhere permanently to the product. This creates a brilliant, slightly indented effect that catches the light and adds a tangible sense of luxury that standard ink simply cannot replicate.
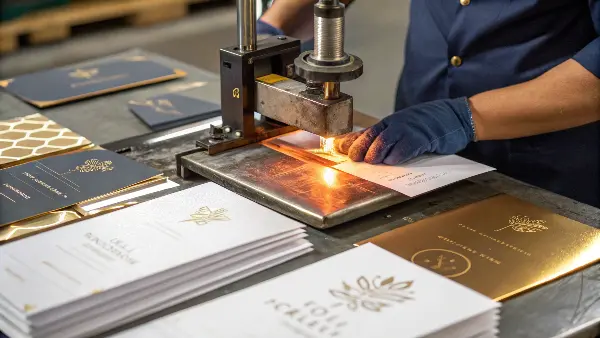
Foil stamping transforms a simple piece of paper into a premium product. As a manufacturer, I’ve seen firsthand how this single process can dramatically increase the perceived value of a notebook or a planner. It’s a craft that combines heat, pressure, and precision to achieve an unmatched result. The process is straightforward but requires expertise. First, we create a custom metal plate, or "die," of your design. This die is heated and then pressed firmly against a roll of foil, which is positioned between the die and the paper. The combination of heat and pressure transfers the foil onto the paper in the shape of your design, leaving a crisp, brilliant impression.
This method is far superior to simply using metallic ink. While metallic ink can mimic the color, it cannot replicate the finish. It sits flat on the paper and lacks the unique, reflective quality of true foil. Foil stamping creates a distinct, slightly recessed texture that customers can feel, adding a tactile element to the visual appeal. This sensory engagement is what makes a product memorable. Here is a simple breakdown of the differences.
Foil Stamping vs. Metallic Ink
| Feature | Foil Stamping | Metallic Ink Printing |
|---|---|---|
| Finish | Genuinely metallic, highly reflective, and opaque. | Less lustrous, contains small metal flakes. |
| Texture | Creates a slight debossed (indented) effect. | Lays flat on the paper surface. |
| Opacity | Fully opaque, looks brilliant on any color paper. | Can look dull on dark or textured paper. |
| Best For | Logos, premium text, luxury packaging. | Large coverage areas, intricate patterns, budget projects. |
How Do Embossing and Debossing Add a Tactile Dimension?
Visual appeal is important, but what about touch? Many stationery products look good but feel flat and uninspired. This missed opportunity means your products don’t create a deep sensory connection with the customer, making them less memorable in a crowded market.
Embossing and debossing are techniques that physically reshape the paper to create a three-dimensional effect. Embossing raises a design from the surface, while debossing presses it in. When combined with foil stamping or used alone, they create a sophisticated, tactile experience that encourages touch and makes your product feel more valuable and thoughtfully crafted.
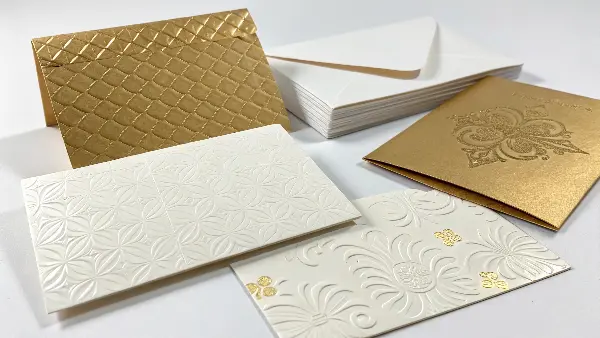
I always advise my clients to think about how their product feels in a customer’s hands. This is where embossing and debossing truly shine. These techniques are all about creating texture and depth. They turn a two-dimensional design into a three-dimensional experience. For a product manager like Michael in Germany, who values design and quality, this tactile element can be a key differentiator in the European market. It speaks of craftsmanship and attention to detail.
The Art of Embossing: Raising the Bar
Embossing uses two custom dies: a "male" die and a "female" die. The paper is pressed between them, forcing the design to rise up from the surface. This creates a raised impression that you can see and feel. It’s excellent for making logos, monograms, or patterns pop. When you combine it with printing or foil stamping (a process called "registered embossing"), the effect is even more dramatic and luxurious. A "blind emboss" (embossing without any ink or foil) offers a subtle, sophisticated effect that communicates quality through pure texture.
The Subtlety of Debossing: A Deeper Impression
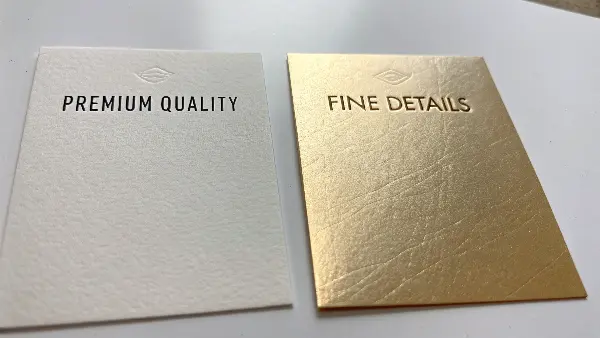
Debossing is essentially the opposite of embossing. It uses a single heated die to press a design into the paper, creating a beautiful, sunken impression. It’s a very popular choice for leatherette journals and premium cardstock. A foil deboss, where foil is applied at the same time the impression is made, is a classic and elegant finish. The foil sits within the recessed area, protecting it from wear and adding a touch of class.
Embossing vs. Debossing at a Glance
| Aspect | Embossing (Raised) | Debossing (Recessed) |
|---|---|---|
| Dies Required | Two (male and female) | One |
| Effect | Design is raised from the paper surface. | Design is pressed into the paper surface. |
| Best For | Stand-out logos, creating a focal point. | Subtle elegance, leather-like materials. |
| Common Use | Invitations, business cards, seals. | Notebook covers, journals, coasters. |
| Feeling | Tactile, prominent, decorative. | Understated, classic, sophisticated. |
What are the Key Differences Between Hot Stamping and Cold Foiling?
You need to choose a foiling method, but the terms "hot stamping" and "cold foiling" are confusing. Picking the wrong one could compromise your design’s detail or limit your paper choices. This uncertainty can lead to production delays or a final product that doesn’t meet your quality standards.
Hot stamping uses heat and pressure with a custom metal die, offering the best quality, crispness, and a slight debossed effect. It’s ideal for premium, simple designs on various paper stocks. Cold foiling uses a UV-curable adhesive and a standard printing plate. This method allows for finer details and gradients, is faster, and works on heat-sensitive materials but offers less brilliance and no texture.
Choosing between hot and cold foiling is a critical decision that depends entirely on your design, material, and budget. One of my clients, a lifestyle brand, wanted to create a notebook with a very intricate, fine-lined floral pattern in foil. For them, cold foiling was the right choice. Another client, a corporate gift supplier, needed a bold, classic logo on a leatherette planner. Hot stamping was the obvious answer for that premium, tactile feel. Understanding the pros and cons of each will help you make the right call every time.
Deep Dive into Hot Foil Stamping
This is the traditional, high-end method. It requires a custom-etched metal die and a specialized press. The process is slower but the result is unmatched in quality. The heat and pressure create a very sharp, clean transfer of foil, and it works beautifully on both coated and uncoated papers, including textured stocks. The pressure also creates that signature debossed look, adding a feeling of depth and permanence. It’s the go-to for luxury products where quality is the top priority.
Understanding Cold Foil Application
Cold foiling is a more modern technique that doesn’t require a custom die or heat. Instead, a UV-curable adhesive is applied to the paper using a standard printing plate. The foil is then pressed onto the adhesive, and a UV light cures and hardens the glue, binding the foil to the paper. This process is faster and can handle very fine details, screens, and even gradients. However, the finish is flat, without any texture, and it can appear slightly less brilliant than hot stamping.
Hot Stamping vs. Cold Foiling: Key Factors
| Factor | Hot Foil Stamping | Cold Foil Application |
|---|---|---|
| Quality & Finish | Highest quality, brilliant shine, crisp edges. | Good quality, less lustrous, flat finish. |
| Texture | Creates a tangible, slightly debossed impression. | No texture; foil lies completely flat. |
| Detail Level | Best for bold lines and standard text. | Excellent for fine lines, gradients, and small text. |
| Setup Cost | Higher (requires a custom metal die). | Lower (uses standard printing plates). |
| Suitable Materials | Wide range of paper and board, including textured. | Best on smooth, coated papers. Not for textured. |
| Ideal Use Case | Luxury branding, simple logos, elegant text. | Intricate designs, projects with foil gradients. |
How Can You Best Prepare Your Designs for Specialty Printing?
You have a beautiful design, but you’re worried it won’t translate well with specialty finishes. A poorly prepared file can result in blurry foil, misaligned embossing, or costly reprints. This fear of a failed production run can stifle your creativity and delay your product launch.
For successful specialty printing, always create your design elements in a vector format (like Adobe Illustrator). Keep foil designs simple, avoiding extremely thin lines or tiny text. For embossing/debossing, ensure your artwork has enough "body" to create a visible impression. Always outline your fonts and clearly separate the specialty finish layers in your digital file.
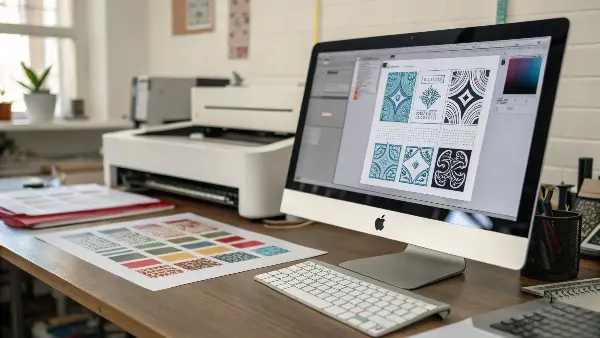
Proper file preparation is the most critical step you can take to ensure a successful outcome. I’ve seen amazing concepts get compromised by poor technical execution. But don’t worry, the rules are actually quite simple. By following a few best practices, you can make the entire process smoother for both you and your manufacturing partner. Think of your design file as the blueprint for our machines—the more precise it is, the better the final product.
The Golden Rule: Vector is King
All artwork intended for foil stamping, embossing, or debossing must be in a vector format. Vector files (.AI, .EPS, or .PDF) are made of lines and curves, not pixels. This means they can be scaled to any size without losing quality, which is essential for creating the sharp metal dies needed for these processes. A pixel-based file (like a .JPG or .PNG) will result in jagged, blurry edges.
Technical Checklist for Flawless Finishes
Here are the essential steps I share with every client to prepare their artwork. Communicating these details clearly with your supplier is key. As a partner, we at Panoffices always double-check these things, but providing a clean file from the start saves time and prevents errors.
| Checklist Item | Why It’s Important |
|---|---|
| Use Vector Files | Ensures clean lines and scalability for die creation. |
| Convert Text to Outlines | Turns fonts into shapes, preventing font-related errors at the factory. |
| Separate Layers | Put your foil, emboss, or deboss elements on a separate, clearly named layer from your print design. |
| Use a Spot Color | Designate the specialty finish area with a solid 100% color (like magenta), making it easy for us to isolate. |
| Check Line Thickness | For foil, avoid lines thinner than 0.25pt. For embossing, lines need to have enough mass to be visible. |
| Provide a Mockup | A simple composite PDF showing how all the layers should look together is incredibly helpful. |
By keeping these tips in mind, you can confidently design products that take full advantage of specialty finishes. The goal is to remove any guesswork, ensuring the beautiful product in your mind is the same one that comes off the production line.
Conclusion
In short, specialty finishes like foil stamping, embossing, and debossing are powerful tools. They turn everyday stationery into premium, tactile products that capture customer attention. Understanding the different techniques and preparing your designs correctly is the key. This knowledge empowers you to make smart decisions and create truly exceptional and memorable items for your brand.

