Dreaming of your perfect custom notebook but overwhelmed by the production journey? It’s a detailed path, but knowing the steps can turn confusion into confident creation.
Custom notebook production involves selecting materials, finalizing designs, printing, binding, quality control, and finally, careful packaging and shipping to ensure your vision arrives intact.
So, you’re looking to create custom notebooks! That’s fantastic. Whether it’s for your brand, a special event, or a new product line like Michael often develops for his European stationery brand, there’s something truly special about a notebook designed just for you. But I get it – the whole process, from a simple idea to holding the finished product, can seem pretty daunting. Where do you even start? What are the pitfalls? I’ve been through this with Panoffices countless times, and I’m here to walk you through it, step by step. Think of this as your friendly guide. Let’s break down how these beautiful, functional items come to life.
Choosing the Right Materials: More Than Just Paper?
Stuck on material choices for your custom notebook, fearing you’ll pick something that looks cheap or isn’t durable? The wrong materials can ruin an otherwise great design.
Key material considerations include cover type (hardcover, softcover, PU leather), paper weight and ruling (lined, blank, dot grid), and binding method (spiral, sewn, casebound) to match your notebook’s purpose and aesthetic.
Alright, first things first – the materials. This is where the tactile experience of your notebook begins, and trust me, it’s about so much more than just paper! When Michael starts a new notebook project, this is where we spend a good chunk of time. He knows his customers appreciate quality they can feel. So, what are we talking about?
- The Cover: This is your notebook’s first impression!
- Hardcover: Often made with greyboard (a type of strong cardboard) wrapped in printed paper, book cloth, or a synthetic material like PU leather. Super durable, gives a premium feel. Think journals or high-end planners.
- Softcover: More flexible. Can be a thicker cardstock (like 250gsm-350gsm), often laminated for protection, or a flexible plastic. Great for everyday notebooks, lighter to carry.
- PU Leather: A popular choice for a sophisticated look without the cost of real leather. Comes in tons of colors and textures. We use this a lot for Panoffices executive notebooks.
- Kraft Paper: For a more rustic, eco-friendly vibe.
- The Inner Pages: The heart of the notebook!
- Paper Weight (GSM – grams per square meter): Typically, notebook paper ranges from 70gsm to 120gsm. Thicker paper (100-120gsm) is better for fountain pens as it reduces bleed-through. 80gsm is a common standard. Michael always tests paper samples with different pens.
- Paper Type/Color: Bright white, cream/ivory, or even recycled paper. Cream paper is often easier on the eyes.
- Ruling: Lined (various spacing), blank, dot grid (a personal favorite of mine for bullet journaling!), square grid, or even custom printed pages (like daily planner layouts).
- The Binding: How it all holds together.
- Spiral/Wire-O: Pages can lay flat or fold back completely. Durable. Great for notebooks used on the go.
- Sewn Binding: Sections of pages (signatures) are sewn together. Allows the notebook to lay relatively flat. Very durable, often seen in high-quality journals.
- Casebound: This is what you see on most hardcover books. The sewn signatures are then glued into the hard cover.
- Saddle Stitch (Stapled): Best for thinner notebooks or booklets. Two staples along the spine.
We usually send Michael a whole swatch kit from Panoffices with different cover materials and paper samples. It makes the decision process so much easier when you can touch and feel everything. It’s like, you wouldn’t buy a car without a test drive, right? Same principle!Nailing the Design and Artwork: What’s Critical for Print-Ready Files?
Worried your amazing notebook design will look terrible in print due to technical file issues? Incorrect artwork is a common cause of production delays and disappointing results.
For print-ready files, ensure your artwork is in vector format (AI, EPS, PDF) for logos, uses CMYK color mode, includes bleed and trim marks, and has high-resolution images (300dpi).
Okay, so you’ve got your materials picked out. Now, let’s talk about making that notebook yours with branding and design. This is where your vision really starts to take shape. But – and this is a big "but" – how your design looks on your screen and how it translates to a physical, printed product can be two different things if you don’t get the artwork files right. Michael, with his industrial design background, is usually pretty clued-up on this, but it’s an area where we see a lot of questions from other clients.
Here’s what your printer (like us at Panoffices) will need for a smooth process:
- File Formats:
- Vector is Your Friend: For logos, text, and any graphic elements that need to be super crisp and scalable, vector files are essential. Common formats are Adobe Illustrator (.ai), .eps, or a print-ready .pdf saved with vector information intact. Why vector? Because it can be scaled up or down infinitely without losing quality or becoming pixelated. You don’t want a fuzzy logo, right?
- Raster for Images: If you have photographic elements, they should be high resolution – typically 300 DPI (dots per inch) at the final print size. Common formats are .tiff or .jpg (though use high-quality .jpg to avoid compression artifacts).
- Color Mode:
- CMYK, Not RGB: Your computer screen uses RGB (Red, Green, Blue) light to display colors. Printing presses use CMYK (Cyan, Magenta, Yellow, Key/Black) inks. Always convert your artwork to CMYK to get the most accurate color representation in print. If you send RGB, the printer will convert it, and you might get some unexpected color shifts.
- Pantone (PMS) Colors: If you have specific brand colors that need to be exact (like Panoffices’ signature blue), provide the Pantone Matching System (PMS) code. This ensures color consistency across different print runs and products.
- Bleed and Trim Marks:
- Bleed: If your design extends to the very edge of the page (like a full-color cover), you need to add "bleed." This means extending the design 3-5mm beyond the final trim edge. Why? Because when the notebooks are cut, there’s always a tiny bit of variation. Bleed ensures there are no unsightly white edges if the cut is a fraction of a millimeter off.
- Trim Marks (Crop Marks): These are little lines that show the printer where to cut the paper to the final size.
- Special Finishes: Thinking about debossing, embossing, foil stamping, or a spot UV varnish? These require separate artwork layers or files indicating exactly where these finishes should be applied. For instance, for foil stamping, we’d need a black-only vector file showing the area to be foiled. I remember a client who wanted their logo debossed, and they sent a low-res JPG… we had to do a bit of artwork recreation there! It’s always best to have it right from the start.
Getting the artwork technically correct saves so much time and potential heartache. We always do a pre-press check at Panoffices, but having good files from the get-go makes everything smoother.The Production Process Itself: What Actually Happens at the Factory?
Ever wonder what goes on behind the scenes to make your notebook? The factory floor can seem like a black box, leading to uncertainty about how your product is actually made.
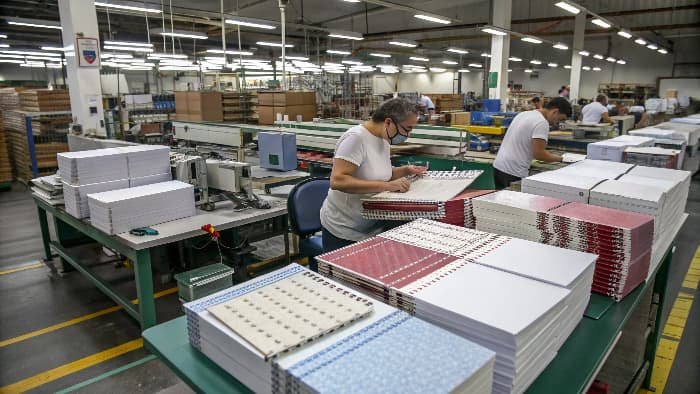
Notebook production involves printing covers and inner pages, precise cutting, binding (spiral, sewn, etc.), and final assembly, including any special features like elastic bands or pockets.

So, the materials are chosen, the artwork is print-ready… now for the exciting part: making the actual notebooks! This is where all the planning comes together. I’ve walked through countless factory floors with Panoffices, and while it can look complex, the core steps are pretty logical. Michael has visited some of our partner factories too; he finds it helps him understand the possibilities and limitations.
Let’s peek behind the curtain:
- Pre-Press: This is where your approved artwork is converted into printing plates (for offset printing) or prepared for digital printing. All colors are checked, layouts confirmed.
- Printing:
- Covers: Usually printed flat on large sheets. If it’s a hardcover, the printed sheets will later be wrapped around the greyboard. Special finishes like lamination (matte or gloss), UV coating, foiling, or embossing happen at this stage or just after.
- Inner Pages: Also printed on large sheets, often with multiple notebook pages on one sheet (this is called imposition). If you have lined or grid pages, these are printed now.
- Cutting & Folding:
- The large printed sheets are precisely cut down to the individual cover or page size using industrial guillotines.
- For sewn notebooks, the cut sheets are folded into "signatures" – usually groups of 8, 16, or 32 pages.
- Binding: This is where it really starts to look like a notebook!
- Spiral/Wire-O: Holes are punched along the spine of the covers and inner pages, then the wire or plastic coil is inserted and closed.
- Sewn Binding: The folded signatures are sewn together along the spine.
- Case Binding (for Hardcovers): The sewn block of inner pages (the "book block") has endpapers glued to it. This book block is then glued into the pre-made hardcover. There’s often a "casing-in" machine for this.
- Perfect Binding (like a softcover book): The edges of the stacked pages are roughened, glue is applied, and the cover is wrapped around.
- Assembly & Finishing Touches:
- Adding elastic bands, ribbon markers, pen loops, or pockets. These are often done by hand or with specialized small machines.
- Rounding corners, if that’s part of your design.
- Final quality checks at each station.
For instance, when we make a batch of Panoffices planners for Michael, the covers might be printed offset for color consistency, then matte laminated. The inner pages, with custom daily layouts, are printed, cut, and collated. Then they go to the Wire-O binding machines. After that, another team attaches the elastic closure. It’s quite an orchestrated dance! It’s not magic, just a series of well-defined steps executed with precision. And it’s pretty cool to watch, honestly. 🔥Quality Control and Pre-Shipment: How Do You Guarantee Perfection?
Afraid of receiving a whole shipment of custom notebooks with flaws or errors? Without proper quality control, you risk wasting money and disappointing your customers.
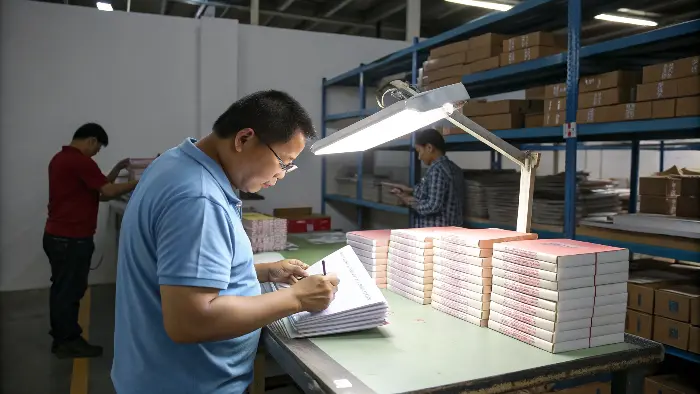
Guarantee notebook quality through pre-production samples (PPS) for approval, in-line inspections during manufacturing, and a final pre-shipment inspection (PSI) against an agreed AQL (Acceptable Quality Limit).

This stage is CRITICAL. I mean, absolutely make-or-break. You’ve invested time and money into designing your perfect notebook, the materials are chosen, production is underway… but how do you ensure the 5,000 notebooks arriving at your warehouse are exactly what you signed off on? This is where robust Quality Control (QC) comes in, and it’s something we at Panoffices take extremely seriously, especially for discerning clients like Michael.
Here’s how we approach it to avoid nasty surprises:
- Pre-Production Sample (PPS) Approval: Before mass production kicks off, we create a final sample using the exact materials, printing methods, and finishing touches specified. This PPS is sent to the client (Michael, in this case) for approval. He checks everything: color accuracy, paper feel, binding strength, dimensions, logo placement – the works. Only once he signs off on the PPS do we proceed with the bulk order. This is your golden sample, the benchmark for everything that follows.
- In-Line Inspections (During Production): We don’t just wait until the end. Our team (or a trusted third-party inspector) will often conduct checks during the production process. For example:
- Checking printed sheets for color consistency against the approved proof.
- Inspecting binding quality as notebooks come off the line.
- Verifying dimensions and assembly of features like elastic bands.
This helps catch any issues early on, rather than discovering a problem after thousands of units are already made. Way more efficient and less wasteful!
- Final Pre-Shipment Inspection (PSI): This is the big one. Once all the notebooks are produced and packed (or at least 80% packed), a final inspection is done. This is often based on AQL (Acceptable Quality Limit) standards. AQL is a statistical sampling method that determines the maximum number of defective units acceptable in a batch. The inspector will randomly select a certain number of notebooks and check them against a detailed checklist covering:
- Quantity
- Workmanship (e.g., no glue stains, scratches, dents, proper alignment)
- Color, materials, and construction (matching the PPS)
- Functionality (e.g., binding holds, elastic works)
- Packaging
- Clear Defect Classification: We work with clients to define what constitutes a "critical," "major," or "minor" defect. For example, a missing page might be critical, a poorly glued cover major, and a tiny, almost invisible scratch minor.
I remember one time, years ago, before we had our current super-stringent PPS process, a batch of journals for a client had the ribbon marker placed just a centimeter off from the agreed position. Sounds small, but for their brand aesthetic, it was a big deal. That taught us a valuable lesson: clarity and meticulous checking at every stage. Now, Michael even sends us photos with rulers on his approved PPS to show exact placements! It’s all about minimizing risk and ensuring you get what you paid for.Packaging and Shipping: Getting Your Notebooks Safely to You?
Worried your beautifully crafted notebooks will arrive damaged after a long journey? Inadequate packaging and sloppy shipping can undo all your hard work and expense.
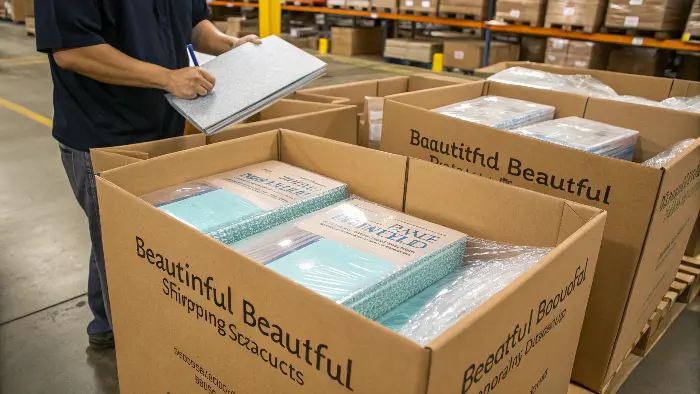
Ensure safe arrival by using protective individual wrapping (e.g., OPP bags), sturdy inner boxes, and strong master cartons, clearly labeled, and by working with reliable freight forwarders for shipping.

You’re almost there! The notebooks are made, quality checked, and look amazing. The final hurdle? Getting them from the factory (often in China, if you’re working with Panoffices) all the way to your warehouse or customers, safe and sound. Don’t underestimate this step! All that effort in production can be wasted if the notebooks arrive damaged. Michael is always very particular about packaging specs, as he knows the journey to Germany can be long.
Here’s what to consider for robust packaging and smooth shipping:
- Individual Protection:
- OPP Bags: Clear plastic bags for each notebook. Keeps them clean, protects from scuffs and minor moisture.
- Shrink-Wrapping: Can be done for individual notebooks or small bundles.
- Belly Bands: A paper band around the notebook, often used for branding, can also offer a little protection.
- Inner Cartons/Boxes:
- Instead of just loose notebooks in a big box, we often pack them in smaller inner boxes (e.g., 10-20 notebooks per inner box). This adds another layer of protection and makes handling easier.
- Make sure these inner boxes are snug, so notebooks don’t shift around too much.
- Master Cartons: The big, strong outer boxes.
- Corrugated Cardboard Strength: Use good quality, double-walled (or even triple-walled for very heavy shipments) corrugated cartons. The strength is often indicated by an ECT (Edge Crush Test) rating.
- Weight Limits: Don’t make cartons too heavy (e.g., generally under 15-20kg or 30-40lbs) for easier manual handling and to prevent crushing.
- Proper Sealing: Use strong packing tape, and consider the "H-tape" method for secure sealing.
- Clear Labeling: Each carton needs clear shipping marks: your company name, address, PO number, carton number (e.g., 1 of 50), country of origin, and any warning labels (e.g., "Fragile," "This Way Up").
- Palletizing (for larger shipments): Stacking cartons on pallets, then shrink-wrapping the entire pallet, makes them easier to move with forklifts and protects them during transit.
- Shipping Logistics:
- Incoterms: Understand your shipping terms (e.g., FOB, EXW, CIF, DDP). This defines who is responsible for what costs and risks during shipping. Michael usually prefers FOB, where Panoffices handles everything until the goods are on the ship.
- Freight Forwarder: You’ll likely work with a freight forwarder to handle the ocean or air freight, customs clearance at both ends, and final delivery. Choose a reliable one! We can recommend forwarders we’ve had good experiences with.
- Insurance: Always a good idea to get cargo insurance. Stuff happens – storms, accidents. It’s better to be covered.
I once saw a shipment arrive where the master cartons were too flimsy for the weight of the notebooks. Some of the bottom boxes were crushed, and a percentage of the notebooks inside were damaged. It was a mess and a costly lesson for that buyer. So, yeah, invest in good packaging – it’s your last line of defense!Conclusion
From initial material choices to final shipping, custom notebook production is a detailed journey. Careful planning and clear communication with your supplier, like Panoffices, ensure your vision becomes reality.

