Struggling to navigate custom book production? It’s complex, with many choices impacting your final product and budget. You need clear, practical guidance to make informed decisions.
The key to successful custom book production lies in understanding your material options, choosing the right printing and binding processes for your project’s volume and quality needs, and knowing how these choices affect overall costs.
Alright, so you’re looking to create a custom book, and let me tell you, it’s an exciting journey! I’ve been in the stationery and print game for a while now with Panoffices, and I’ve seen how overwhelming it can get. But don’t you worry. I’m here to break it down, make it simple, and share what I’ve learned. We’ll walk through the essentials so you can feel confident about your project. Let’s get started, shall we?
What Key Materials Shape Your Custom Book’s Look, Feel, and Cost?
Choosing materials feels like the first big step, right? Get it wrong, and the whole book feels off. You want durability, the right texture, and something that fits the budget.
Paper, binding cloth, adhesives, and cover boards are the foundational materials. Their selection critically influences the book’s aesthetics, tactile experience, durability, and, significantly, the production cost.
When I talk to clients like Michael, who knows his stuff in product development, the conversation often starts with paper. It’s just so fundamental.
Paper Choices
For novels or textbooks, uncoated paper is a classic. It has that traditional book feel, you know? Easy on the eyes for reading. But if you’ve got a project heavy on high-quality images, like a comic book or an art catalogue, coated paper is your friend. It’s got a smooth, often glossy or silk finish that makes colors pop. One thing to remember with coated paper, though – it can be a bit tricky with standard glues, sometimes needing a stronger, pricier polyurethane adhesive. And then there’s paper weight, measured in GSM or pounds. Heavier paper feels more premium and is more durable, but it also increases the spine width and, you guessed it, the cost. It’s a balancing act. I always suggest getting samples; feeling the paper is so important.
Beyond Paper
Then you have binding cloth for hardcovers. It adds to the durability and gives a really nice, premium aesthetic. Of course, you can use other fabrics or even specialized paper materials for covers. For holding it all together, glues or adhesives are crucial. PVA (Polyvinyl Acetate) is a common go-to; it’s pretty durable and stays flexible, which is great for the spine. For the actual covers of hardback books, you’ll use cardboard or book board – this gives the rigidity. And don’t forget smaller details like thread for sewn bindings (super strong!) and ribbons for bookmarks. Some projects even call for special materials like leather, embossing foils, or metal clasps for that extra wow factor. Each of these choices, from the paper grammage to a fancy foil, will nudge the final price up or down. It’s all about matching the material to the book’s purpose and your brand’s image.
Which Printing Process Is Right for Your Custom Book Project and Budget?
Got your materials sorted in your head? Great! Now, how do we get your amazing content onto them? The printing choice can seriously impact quality and cost, especially with different run sizes.
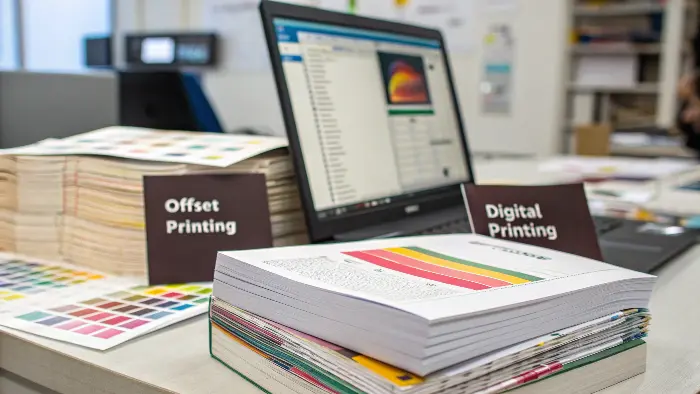
Offset printing is ideal for large quantities (500+ copies) needing top-notch color, while digital printing offers a cost-effective, faster solution for smaller batches and customization.

Before any ink hits the paper, though, let’s talk design and typesetting. This is where your manuscript, images, and layout all come together. I always stress to my clients: get this part perfect. Finalize everything, make sure images are high-res, and prepare print-ready PDFs. A small error here can be a big headache later. Trust me on this one!
Offset Printing
Now, for the printing itself. If you’re planning a big run, say over 500 or definitely over 1000 books, offset printing is usually the way to go. Think of it like the workhorse for high-volume, high-quality jobs. The color reproduction is fantastic, especially for detailed illustrations or photography. Plus, offset gives you more flexibility with paper types and special post-print finishes. The downside? Higher setup costs. Each color needs its own plate, so it’s not economical for small runs. And, the turnaround time is generally a bit longer. I remember a client who needed 5,000 high-end corporate brochures; offset was a no-brainer for the quality and per-unit cost at that volume.
Digital Printing
On the other hand, if you need a smaller batch – maybe less than 500 copies – or if you need them super quick, digital printing is your hero. It’s much more cost-effective for short runs because there are minimal setup costs compared to offset. No plates! This also makes it great for things like personalized books or print-on-demand scenarios. The quality of digital has come a long way too; it’s really impressive these days. It’s a fantastic option for proofs, limited editions, or when you’re testing the waters with a new title. Speed and flexibility are its biggest selling points. Choosing between offset and digital really boils down to your quantity, quality requirements, timeline, and budget.
How Do Different Binding Methods Affect Your Book’s Durability, Usability, and Overall Cost?
Your pages are printed, looking sharp! But they’re just loose sheets for now. The binding is what turns them into an actual book, and boy, does it affect how the book is used and how long it lasts.
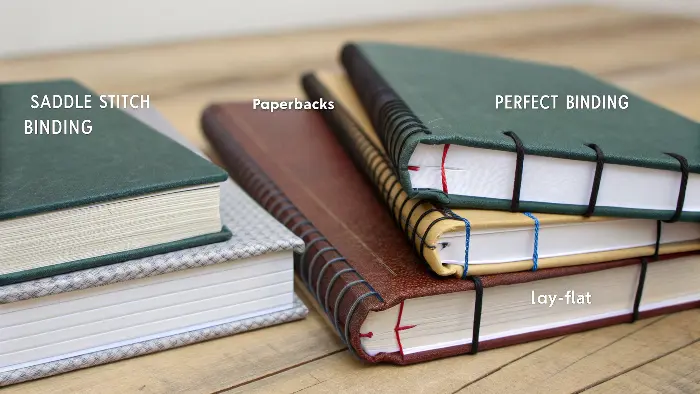
Binding methods like saddle stitch are for thin booklets, perfect binding for paperbacks, spiral for lay-flat needs, and hardcover for maximum durability and perceived value, each with different cost implications.

Picking the right binding is about more than just holding pages together; it’s about the reader’s experience and the book’s lifespan.
Common Binding Types
Let’s start with saddle stitch binding. This is super simple and cost-effective. Pages are folded and stapled through the spine. It’s ideal for thin books, magazines, or brochures – usually under 48-64 pages, depending on paper thickness. They lay relatively flat, which is nice.
Then there’s perfect binding, the go-to for most softcover books, like your typical paperback novel or business report. The edges of the pages are glued together at the spine, and the cover wraps around it. It gives a neat, flat spine where you can print the title. It looks professional but doesn’t lay completely flat without a bit of "encouragement."
For books that need to lay perfectly flat, like workbooks, manuals, or calendars, spiral binding (or coil binding) is a popular choice. It uses a plastic or metal coil threaded through holes punched along the spine. You can even fold the book back on itself. Wire-O binding is similar but uses double-loop wire, giving it a slightly more upscale look and feel, and still allows for that lay-flat convenience. I’ve seen Wire-O used beautifully in high-end journals and planners.
Premium and Durable: Hardcover
And finally, the king of durability: hardcover binding (also called case binding). Here, the pages are often sewn together in sections (signatures), which is super strong, and then glued to a rigid cover made of book board, often wrapped in cloth, paper, or leather. This is your premium option – think textbooks, collector’s editions, or high-quality coffee table books. It costs more, for sure, because it’s more labor-intensive and uses more materials, but it screams quality and longevity. Each of these methods has its own cost structure, with saddle stitch being the cheapest and hardcover generally being the most expensive. It’s all about matching the binding to the book’s purpose and how you want it to be perceived.
What Finishing Touches and Cover Design Choices Can Truly Make Your Custom Book Stand Out?
The core of your book is set, but how do you make it irresistible on the shelf or in someone’s hands? The cover design and those little finishing touches – they’re the cherry on top!
A compelling cover design combined with tactile finishes like lamination, embossing, or foil stamping can significantly enhance a book’s appeal, perceived value, and protection, justifying their added cost.

Never underestimate the power of a great cover! It’s often the first thing someone sees, and as we all know, people do judge a book by its cover, at least initially. I always tell my clients, especially those like Michael who are developing product lines, that investing in professional cover design is money well spent. It needs to be eye-catching, reflect the content, and appeal to your target audience.
Cover Material & Design
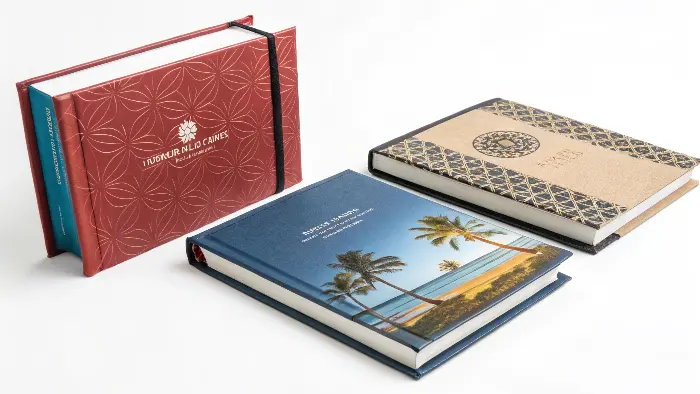
Cover material options are varied. For paperbacks, it’s usually a heavier card stock, perhaps coated for vibrancy. For hardcovers, as we mentioned, you can use paper, cloth, faux leather, or even genuine leather wrapped around the board. Each gives a different tactile and visual impression. Then, how do you make that cover really sing? This is where finishing touches come in. Lamination (gloss, matte, or even soft-touch) is very common. It adds a protective layer against scuffs and moisture, and a matte or soft-touch lamination can feel incredibly luxurious. I’m a big fan of soft-touch; it just invites you to pick up the book.
Special Enhancements
Want to add some texture or metallic shine? Embossing (raising a design) or debossing (indenting a design) can add a sophisticated, tactile element. Think of a logo or title that you can feel. Foil stamping is another favorite of mine – applying metallic or colored foil to create shiny, eye-catching details. Gold or silver foil on a dark cover? Classic and stunning! You can also consider spot UV, where a glossy varnish is applied to specific areas of the cover to make them stand out against a matte background. These special finishes do add to the cost and production time, no doubt. But for the right project, they can elevate a simple book into something truly special and memorable. It’s about creating that "wow" factor that makes someone say, "I need this book!" 🔥
Conclusion
Understanding materials, printing, binding, and finishing is key. These choices shape your book’s look, feel, and cost. Make them wisely!

