Choosing the right bookbinding can feel like a puzzle. Pick wrong, and you might face higher costs or a less-than-ideal product. Let’s break it down so you can choose wisely!
The "best" book binding really depends on your specific project. It’s a balance of cost, how durable it needs to be, and what kind of book you’re making. For publishers, like my friend Michael in Germany, getting this right is crucial for making a great impression and staying on budget.
Picking the right binding is a big deal, isn’t it? It affects not just how your book looks and feels, but also how much it costs to produce and how long it’ll last. I’ve seen folks get really stuck on this, especially when they’re trying to launch a new line of notebooks or a special edition planner. It’s more than just holding pages together; it’s about presenting your content in the best possible way. So, let’s dive into the nitty-gritty and help you make an informed choice, one that makes sense for your brand and your bottom line. You want something that screams quality but doesn’t break the bank.
What Are the Different Types of Book Binding Techniques, Anyway?
Ever feel a bit overwhelmed by all the binding jargon? You’re not alone! Knowing the main types is the first step. Let’s shed some light on this.
The most common binding techniques you’ll encounter are saddle stitch, perfect binding, case binding (that’s your classic hardcover), and spiral or wire-o binding. Each has its own playground where it shines.
When I first started in this stationery game, I thought binding was just… binding. Boy, was I wrong! It’s a whole world. As a B2B supplier with Panoffices, we work with these methods day in and day out, helping clients like Michael figure out what’s best for their latest product line. Let me break down the main players for you.
Common Binding Methods Explained
| Binding Type | Description | Best For | Pros | Cons |
|---|---|---|---|---|
| Saddle Stitch | Sheets are folded and stapled through the spine. | Booklets, magazines, brochures, thin notebooks (typically under 64-80 pages). | Economical, lies relatively flat, quick turnaround. | Page count limited, less durable, spine can’t be printed. |
| Perfect Binding | Pages are glued together at the spine with a flexible adhesive, then covered. | Paperback books, thicker magazines, journals, corporate reports. | Printable spine, professional look, good for higher page counts. | Doesn’t lay completely flat, spine can crack with age. |
| Case Binding | Pages are sewn or glued into a block, then attached to a rigid cover. | Hardcover books, premium notebooks, yearbooks, high-end journals. | Very durable, premium feel, long-lasting, lays flatter than perfect. | Most expensive, longer production time. |
| Spiral/Wire-O | Holes are punched along the spine, and a plastic or metal coil is inserted. | Notebooks, planners, manuals, calendars, presentations. | Lays completely flat, can fold back on itself, various coil colors. | Pages can tear out, less formal look, spine not printable. |
| Sewn Binding | Signatures (groups of folded pages) are sewn together before being bound. | Often used with Case Binding for ultimate durability; high-quality books. | Extremely durable, pages won’t fall out, lays fairly flat. | More expensive than just gluing, adds to production time. |
Understanding these options is fundamental. For instance, Michael, who develops stationery lines, often needs spiral binding for planners that need to lay flat for writing, but he might choose perfect binding for a sleek, retail-ready journal. We, at Panoffices, always guide our clients through these choices, considering their target audience, brand identity, and, of course, budget. It’s about matching the construction to the content and its intended use. Think about how the end-user will interact with the product. That often points you to the right binding.
So, What Is the Absolute Best Book Binding Method Out There?
Ah, the million-dollar question! Everyone wants the "best," but is there really a one-size-fits-all answer for bookbinding? Let’s think about this.
Honestly, there’s no single "best" book binding method. The ideal choice hinges entirely on your project’s specific needs: your budget, page count, desired aesthetic, and how the final product will be used.

I wish I could just tell you, "Yep, option X is the undisputed champion!" But it just doesn’t work that way. It’s like asking what the best car is. A sports car is great for speed, but terrible for a family of five needing groceries. Same idea here. The "best" binding for a slim promotional booklet is totally different from the "best" for a deluxe coffee table book or a daily planner that needs to withstand a year of heavy use. When I talk to clients, the first thing I try to understand is the purpose of their product.
Finding Your "Best Fit"
What makes a binding method "best" for you? Let’s consider a few scenarios:
- The School Notebook Project: Imagine Michael is sourcing a new line of notebooks for the back-to-school season. He needs something durable enough for daily use by students, cost-effective for mass production, and functional. Here, spiral or wire-o binding often comes out on top. Why?
- Lays Flat: Essential for writing. Students can easily write across the entire page.
- 360-Degree Fold: You can fold the notebook back on itself, saving desk space.
- Cost-Effective for Medium Runs: While not the absolute cheapest, it offers great value for its functionality.
We at Panoffices can even customize the coil color to match school branding! That’s a nice touch.
- The Premium Corporate Gift Journal: Now, let’s say Michael’s company wants to create a high-end journal as a corporate gift. Here, the perception of quality is paramount.
- Case Binding (Hardcover): This immediately signals "premium." A sturdy cover, perhaps with debossed branding, feels substantial.
- Sewn Pages: For added durability and a better lay-flat quality than perfect binding, sewn pages within a case bind are ideal.
- Aesthetics: Options for cover materials (linen, faux leather), ribbons, and endpapers really elevate the product. This is where Panoffices’ OEM capabilities shine, allowing for deep customization.
- The Mass-Market Paperback Novel: If it’s a trade paperback, the goal is a good reading experience at an accessible price point.
- Perfect Binding: This is the industry standard for paperbacks. It allows for a printable spine (crucial for bookstore visibility) and is cost-effective for large print runs. While it doesn’t lay perfectly flat, it’s generally accepted for this format.
The "best" method is the one that aligns with your product’s function, your brand’s image, and your customer’s expectations, all while fitting your budget. It’s a balancing act, for sure. I always tell Michael, "Let’s walk through your user’s journey with this product, and the best binding will often reveal itself."Alright, Let’s Talk Money: What’s the Cheapest Book Binding Method?
Okay, budgets are a reality for everyone, right? If you’re looking to keep costs down, especially for certain types of projects, knowing the most economical option is key.
- Perfect Binding: This is the industry standard for paperbacks. It allows for a printable spine (crucial for bookstore visibility) and is cost-effective for large print runs. While it doesn’t lay perfectly flat, it’s generally accepted for this format.
Generally speaking, saddle stitch binding is the most cost-effective method, particularly for publications with a low page count like thin booklets, brochures, or simple event programs. It’s quick and uses minimal materials.

When I’m working with clients who have a tight budget for, say, a promotional handout or a small zine, saddle stitching is almost always the first thing we discuss. It’s straightforward, the setup is relatively simple for printers, and it doesn’t involve complex adhesives or cover constructions. This directly translates to lower per-unit costs, especially when you’re not printing a huge volume. Think about those little informational pamphlets you pick up, or a thin program for a local play – that’s often saddle stitch.
Why Saddle Stitch is King of Cost-Effectiveness (for the right job)
The economy of saddle stitch comes down to a few things:
- Simplicity: Sheets are just folded and stapled. No glue, no complex cover attachment. This means less machine time and less labor.
- Material Usage: It uses the least amount of material beyond the paper for the pages themselves – just a couple of staples.
- Speed: The process is fast, especially on automated lines. This means quicker turnaround times, which can also save money if you’re on a tight deadline.
However, "cheapest" doesn’t always mean "best value" for every project. If your page count is too high (usually over 64-80 pages, depending on paper thickness), saddle stitch just won’t work well. The booklet will bulge, a phenomenon we call "creep" (more on that later), and it won’t look professional. Also, the spine isn’t printable, which is a big deal if you need your publication to stand out on a shelf.
So, while saddle stitch is your go-to for thin, budget-conscious projects, it’s important to weigh its limitations. For instance, Michael might use it for a small, seasonal product catalogue, but not for a flagship journal. We at Panoffices help clients analyze this trade-off: is the cost saving worth the potential compromise in perceived quality or functionality for this specific product? Sometimes it is, sometimes it isn’t. It’s about smart choices, not just cheap ones. If your page count creeps up, perfect binding might become more economical or at least offer better value for a slightly higher cost.Saddle Stitch Sounds Great, But What Are the Disadvantages of Saddle Stitch Binding?
So, we’ve established saddle stitch is often the cheapest. But cheap doesn’t always mean it’s the right fit, and it definitely has its downsides. It’s important to know these before you commit.
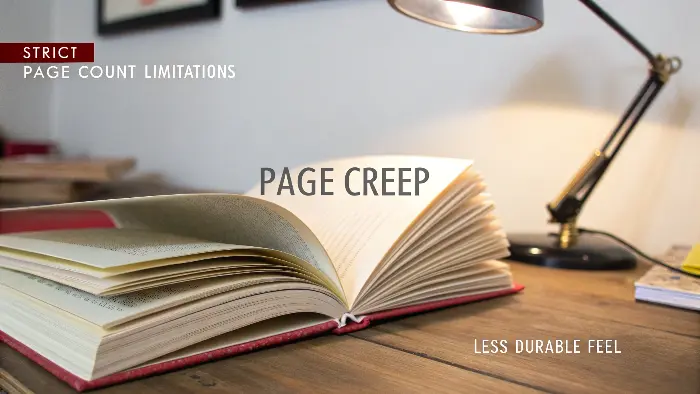
The main disadvantages of saddle stitch binding include strict page count limitations (it’s not for thick books), the issue of "page creep" in bulkier booklets, and a generally less durable or premium feel compared to other methods.

I’ve seen it happen – a client is super focused on keeping costs low, so they push for saddle stitch on a project that’s just a bit too thick for it. The result? It can look a bit… amateurish. The staples might struggle, or the inner pages stick out further than the outer ones. It’s one of those things where trying to save a few pennies can cost you in terms of presentation.
Diving Deeper into Saddle Stitch Drawbacks
Let’s break down those disadvantages, because they can be deal-breakers depending on your project:
- Page Count Limitation: This is the big one. Saddle stitch works by folding sheets of paper in half and stapling them through the fold.
- The Problem: The more pages you add, the bulkier the spine becomes before stapling. Once stapled, a thick saddle-stitched book won’t lie flat nicely and can spring open.
- General Rule: Most printers will recommend saddle stitch for up to about 64 pages, maybe 80 with very thin paper. Anything more, and you’re pushing it. For Panoffices, if a client like Michael wants a 100-page notebook, we’d steer him away from saddle stitch immediately and suggest something like perfect binding or spiral.
- Page Creep: This is a subtle but important detail.
- What it is: In a saddle-stitched booklet, the inner pages have to "travel" further around the fold than the outer pages. To compensate, printers trim the booklet after folding and stapling. However, this means the inner pages will have a slightly smaller width than the outer pages. If not managed well, or if the booklet is too thick, this "creep" can be noticeable and margins can look uneven.
- Why it matters: For design-sensitive work, like a product catalog where images need precise placement, significant creep can be a real headache.
- Durability: Staples are okay, but they aren’t the toughest.
- Wear and Tear: With heavy use, pages can sometimes pull away from the staples, especially the centerfold. It’s not ideal for items that will be handled a lot or need to last a very long time.
- Less Professional Feel (for some applications): While perfect for informal booklets or zines, if you’re aiming for a more substantial, high-quality feel – say for a journal Michael wants to position as a premium item – saddle stitch usually doesn’t cut it. It doesn’t have that "bookstore quality" feel.
- No Printable Spine: The spine of a saddle-stitched booklet is just the folded edge. You can’t print a title or author name on it. This makes it invisible on a bookshelf. If shelf presence is important, you need another method like perfect binding or case binding.
So, while saddle stitch is a fantastic, economical option for thin publications where longevity and a super-premium feel aren’t top priorities, it’s crucial to understand its limits. It’s all about choosing the right tool for the job!Conclusion
Choosing the right bookbinding balances cost, use, and looks. Consider your project’s specific needs carefully to make the smartest, most effective choice for your publication.

