Ever held a brand-new book and wondered how it transformed from a simple idea into the solid object in your hands? It seems like magic, but it’s a fascinating industrial process. Let’s peek behind the curtain!
Commercial books are made through a highly mechanized process: printing pages, folding them into sections (signatures), binding these using methods like perfect binding or case binding, and finally, trimming them for a clean finish. Covers are printed separately and attached.
When I think about manufacturing, even for our stationery at Panoffices, I’m always amazed by the precision involved. And bookbinding? That’s a whole other level of artistry combined with hardcore engineering. It’s not so different from how Michael, our stationery buyer friend in Germany, would appreciate a well-made notebook – the attention to detail, the feel of the finished product. It all starts with a plan, and then, a whole lot of specialized machines and skilled people get to work. So, let’s walk through this journey, from a digital file to a book you can actually hold. It’s quite something!
What’s the First Step: From Digital File to Printed Page in Book Manufacturing?
Turning a writer’s digital words into physical, printed sheets seems like a giant leap, right? If this crucial first stage isn’t perfect, the whole book project can suffer. So, how does it actually begin?
The journey from digital file to printed page starts with rigorous pre-press checks to ensure quality. Then, large sheets are printed with multiple pages, often using offset or digital printing, forming the foundation of the book.
Before any ink hits paper, there’s a super important stage called pre-press. Think of it as the final check-up before the main event. We do something similar for our custom notebooks at Panoffices – gotta make sure the artwork is spot on! For books, this means a team will review the digital files, checking for things like image resolution, correct fonts, and page layout. They’ll often create proofs – either digital or physical printouts – for the publisher to approve. Once everyone’s happy, the pages are arranged in a specific layout called an "imposition." This isn’t random; it’s so that when the large printed sheets are folded, the pages end up in the correct order.
Then comes the printing. For big print runs, offset lithography is the go-to. It involves creating printing plates (usually aluminum) for each color. These plates transfer ink to a rubber blanket, which then transfers the ink to the paper. It’s incredibly efficient for thousands of copies. For smaller runs, or books needing personalization, digital printing is more common. It’s more like your high-end office printer but on a massive scale. The result? Stacks of large, flat sheets, each holding multiple pages of the book – often 8, 16, or 32 pages per sheet. These printed sheets are the raw material for the next stage. It’s all about precision here, because any mistake now gets multiplied many times over!
Once Printed, How Are Those Pages Folded and Gathered into Book Blocks?
So you have these massive printed sheets. How do they become something that even remotely resembles a book’s inside? Getting the pages in the right order is key, or you’d have a very confusing read!
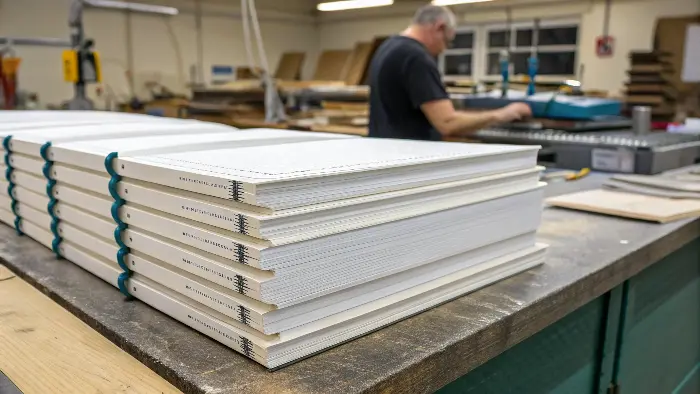
After printing, the large sheets are precisely folded by machines into "signatures" – small booklets of usually 16 or 32 pages. These signatures are then gathered in the correct sequence to form the book block.
Alright, those big printed sheets we just talked about? Now they head over to some seriously impressive folding machines. These aren’t your simple paper-folding exercises; these machines are fast and incredibly precise. Each large sheet, with its multiple pages printed on it, is folded multiple times to create what’s called a "signature" or a "section." Typically, a signature might contain 16 or 32 pages, all neatly folded and in the correct sequence. Imagine folding a big newspaper down until it’s a little booklet – that’s the basic idea, but way more accurate.
Once you have a stack of each signature (Signature A, Signature B, Signature C, and so on, for the whole book), these need to be put in the right order. This process is called "gathering" or "collating." In big binderies, this is also done by machine. The gathered signatures, now forming the complete set of pages for the book in the correct order, are called a "book block." This book block is essentially the guts of the book, but it’s still just a stack of folded paper. It hasn’t been bound together yet, and the edges are still uneven from the folding. Think of it like Michael getting all the components for a new stationery set ready before assembly – all the right pieces are there, waiting for the next step. The accuracy here is paramount; one signature out of place, and the whole book is wrong.
Perfect Binding: How Are Those Sleek Paperback Spines Actually Created?
You know those smooth, flat spines on paperback books? They look so neat and professional. But how do they get loose pages to stick together so perfectly and hold a cover? It’s a very common method.
Perfect binding creates smooth paperback spines by stacking the gathered signatures, milling the spine edge to create a rough surface for better adhesion, applying strong hot-melt glue, and then immediately attaching the cover.

"Perfect binding" is a super popular method, especially for paperback books, journals, and thicker magazines. It’s how you get that clean, flat spine. I’ve seen this process up close, and it’s pretty slick. First, the gathered signatures – that book block we just talked about – are stacked and clamped tightly together. Then, the magic happens at the spine edge. This edge, which is made up of all the folds, is "milled" or "ground off." This might sound destructive, but it’s crucial. It removes the folds and creates a rough surface on the edge of every single page. Why rough? Because it helps the glue stick much, much better.
Next, a strong, flexible hot-melt glue is applied to this roughed-up spine. Immediately after the glue application, the pre-printed cover (which is usually a single piece of cardstock, scored for the spine and hinges) is wrapped around the book block and pressed firmly into place. The glue cools and sets pretty quickly, bonding the pages together and securing the cover. And voilà – you have a perfect bound book! The final step is usually a three-knife trimmer that cuts the top, bottom, and fore-edge of the book to give it those nice, clean, uniform edges. It’s a cost-effective method for many types of publications, and it’s what gives paperbacks that classic look and feel. It’s all about that glue and that roughed-up edge – simple, but effective!
Beyond the Pages: How Are Professional Book Covers Designed and Attached?
The cover is the first thing anyone sees – it’s the book’s handshake! So how are these crucial elements made to be both attractive and durable, and how do they join the book?
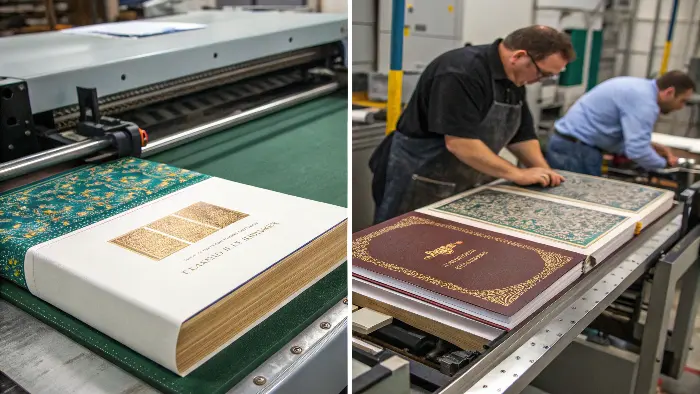
Professional book covers are printed separately, often with special finishes like lamination or spot UV. For perfect bound books, the scored cover is glued directly to the spine; for hardcovers, a more complex "casing-in" process is used.

A book cover is so much more than just a protective layer; it’s a mini-poster for the story or information inside! The design itself is a whole creative process, but once that’s finalized, producing the physical cover is key. Covers are usually printed on heavier card stock than the interior pages. They can be printed using offset or digital methods, just like the insides. But then, they often get some special treatment to make them pop and to add durability. Lamination is very common – a thin plastic film (either gloss or matte) is applied to the cover. This protects it from scuffs, fingerprints, and moisture. Think about how many times a popular paperback gets handled! Other cool finishes include spot UV (where a glossy varnish is applied to specific areas, like the title), embossing (raising parts of the design), or debossing (imprinting parts of the design). These add tactile and visual appeal. It’s like when we offer different finishes on our Panoffices notebook covers – that little extra touch makes a big difference.
For perfect bound books, as we just discussed, the cover is a single piece that’s scored for the spine and then glued directly to the book block’s spine. For hardcover books, it’s a bit different. The cover, or "case," is made separately. It involves gluing printed paper or cloth over stiff boards. Then, the book block (which is often sewn for hardcovers) is attached to this case in a process called "casing-in," usually by gluing the endpapers to the inside of the boards. This makes hardcovers much more durable.
What About Hardcovers and the Final Trimming Touches?
Hardcover books feel so substantial and permanent, don’t they? And regardless of binding, how do all books get those perfectly neat edges? It’s all about the finishing steps making them ready for readers.
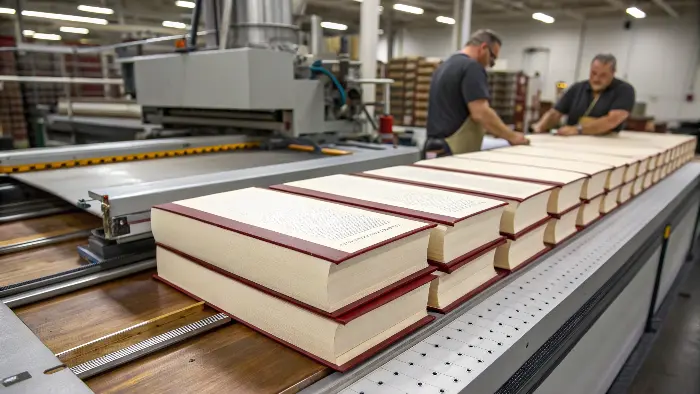
Hardcover binding involves sewing signatures, creating a rigid "case" from boards and cover material, then "casing-in" the book block. Finally, all book types are trimmed on three sides for a sharp, uniform finish.

Hardcover books, or "case bound" books, are the sturdy champions of the bookshelf. They’re built to last! The process is a bit more involved than perfect binding. Often, the signatures for a hardcover book are sewn together along the spine rather than just glued. This sewing makes the book block incredibly strong and allows the book to lie flatter when open. Once the book block is sewn, "endpapers" (strong sheets of paper) are tipped onto the first and last signatures.
Meanwhile, the "case" – the actual hard cover – is made. This involves taking stiff boards (think heavy-duty cardboard) cut to size, and covering them with printed paper, cloth (like buckram), or other materials. The cover material is wrapped around the boards and glued down. Then comes "casing-in": the sewn book block is glued into this case. The endpapers are what get glued to the inside of the boards, connecting the book block to its cover. It’s a robust construction!
Finally, whether it’s a perfect bound paperback or a sturdy hardcover, most books go through a final trimming process. This is done by a machine called a three-knife trimmer or a guillotine. It trims the top, bottom, and fore-edge (the edge opposite the spine) of the book simultaneously. This ensures all the pages are perfectly flush and the book has clean, sharp edges. It removes any slight variations from the folding and binding process. It’s that last little bit of precision that gives a book its finished, professional look. It’s like the final quality check before it goes out the door – something we’re very familiar with at Panoffices!
Conclusion
From digital files to printed, bound, and trimmed reality, making a commercial book is a symphony of precise machinery and skilled craftsmanship. Now you know the magic behind those pages! Panoffices appreciates such dedication to quality.

