Are you tired of sourcing notebooks only to find that quality varies wildly from batch to batch? Weak spines, loose pages, and warping covers can damage your brand’s reputation and lead to costly returns. Understanding the key indicators of quality empowers you to evaluate samples effectively and set clear, enforceable standards with your suppliers.
To evaluate book binding quality, you need a checklist. Focus on the spine’s construction: is it flexible yet strong? Check the cover attachment for gaps and ensure it’s firmly glued. Test page adhesion by gently tugging a page—it shouldn’t pull out easily. Inspect the overall finish for smooth, clean cuts and no glue residue. Finally, confirm the book is square and assess how it lays flat. These criteria ensure the durability and premium feel essential for wholesale success.
Evaluating a finished product is one thing, but truly understanding quality means knowing how it’s made. For buyers like me, comprehending the process from the ground up allows for better communication with manufacturers and a sharper eye for detail during inspections. When I can talk about specific tools or measurement standards, it builds a stronger partnership with my suppliers. Let’s start with the fundamentals of how a well-bound book comes to be.
What are the essential tools used in book binding?
Ever find yourself wondering what happens behind the scenes to create a perfectly bound notebook? Without the right equipment, even the best materials can result in a shoddy product with uneven edges or a weak spine. This lack of knowledge can make it difficult to discuss technical specifics with manufacturers or identify potential quality issues early on.
The essential tools for professional book binding include a bone folder for crisp creases, a guillotine for clean edges, binding needles and thread for sewing signatures, and a book press to ensure flatness and strong adhesion. Adhesives like PVA glue are critical. In large-scale production, automated machines handle folding, collating, sewing or gluing, and trimming. Understanding these tools is the first step to assessing manufacturing quality.
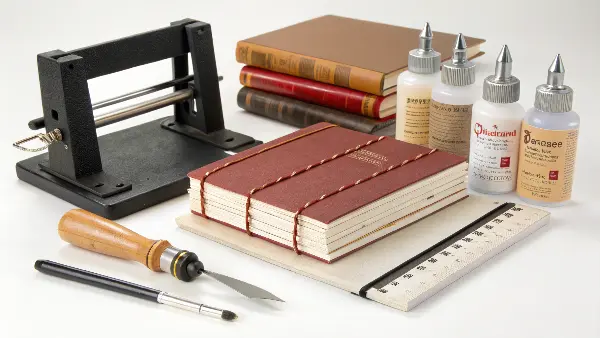
To really appreciate what goes into a well-crafted notebook, it helps to distinguish between the tools used in traditional hand-binding versus those in a modern, automated factory. While the principles are the same, the scale and precision are vastly different. Knowing this helps me ask suppliers the right questions about their capabilities. For instance, I might ask about the calibration of their trimming machines, not just if they have one.
Hand-Binding vs. Machine-Binding Tools
In custom or small-batch production, artisans use hand tools that require immense skill. In the factories we partner with for large orders, these processes are replicated by massive, highly precise machinery to ensure consistency across thousands of units. However, the function of the tools remains the same.
Here’s a simple breakdown of the tools and their machine equivalents:
| Tool/Process | Hand-Binding Role | Machine-Binding Equivalent | Quality Impact |
|---|---|---|---|
| Folding | A bone folder is used to manually press each fold in a paper signature, making it crisp. | An industrial folding machine scores and folds thousands of sheets per hour with perfect consistency. | A poor fold leads to page misalignment, known as "creep." |
| Trimming | A sharp blade or hand-held plough is used to trim the edges of the text block. | A three-knife guillotine trims all three open sides of a book in a single, powerful motion. | Dull blades cause "feathering" or rough edges. |
| Sewing | An awl punches holes, and a needle and thread are used to sew signatures together. | An industrial sewing machine, like a Smyth sewer, automates this for ultimate strength. | Proper thread tension is key to a durable, lay-flat spine. |
| Pressing | A manual book press applies immense pressure to flatten signatures and set glue. | Hydraulic clamps and drying lines in a perfect binder serve the same purpose on a massive scale. | Insufficient pressure results in a weak bind and a book that won’t stay closed. |
I once visited a potential new supplier and noticed their trimming blades had visible nicks. That one small detail told me a lot about their attention to quality control. We ended up discussing their equipment maintenance schedule before placing an order. It’s these small signs, rooted in an understanding of the tools, that separate a great supplier from an average one.
What is the perfect book binding method?
Choosing a binding method can feel overwhelming. You see terms like saddle-stitch, perfect bound, and Smyth-sewn, but which one is actually right for your new product line? Making the wrong choice can lead to a notebook that doesn’t function as intended, looks cheap, or falls apart over time, completely undermining your brand’s promise of quality.
There is no single "perfect" book binding method; the best choice depends entirely on the product’s intended use, page count, and desired quality level. For ultimate durability and a lay-flat design, Smyth-sewn binding is superior. For cost-effective notebooks with many pages, perfect binding is the commercial standard. Meanwhile, spiral binding offers 360-degree fold-over capability perfect for planners and manuals, and saddle-stitching is ideal for thin booklets.
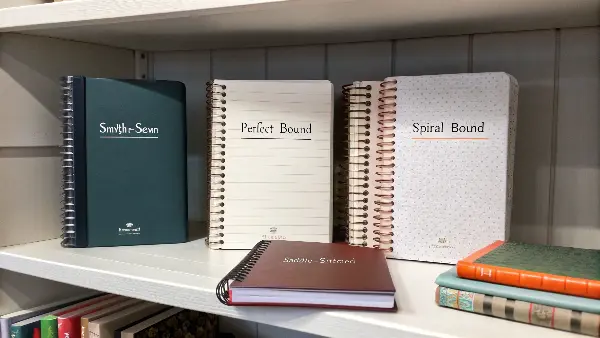
The binding is the functional heart of any notebook or journal. It dictates how the book opens, how it wears over time, and its perceived value. When I’m developing a new product, the binding method is one of the first specifications I decide on, as it influences everything from the page layout to the final price point. For our brand, matching the binding to the product’s intended use is non-negotiable. Let’s break down the most common methods so you can choose with confidence.
For Durability and Prestige: Smyth-Sewn
This is the gold standard. Here, pages are grouped into "signatures" (typically 16 or 32 pages), which are then folded and sewn together with thread. All the signatures are then sewn together to create a single text block, which is glued into the cover. For our premium leatherette journal line, we exclusively use Smyth-sewn binding. The ability for it to lay perfectly flat during use is a feature our customers expect.
For Cost-Effectiveness: Perfect Binding
This is the most common method for softcover trade books and many commercial notebooks. The pages are stacked into a text block, the spine edge is roughened up, and a strong, flexible adhesive is applied to hold the pages and the cover together. While it doesn’t lay completely flat, modern PUR (Polyurethane Reactive) adhesives have made perfect binding much more durable and flexible than it used to be.
For Functionality: Spiral & Wire-O
For planners, cookbooks, or technical manuals, functionality is king. Both spiral (a single continuous coil) and Wire-O (a series of double-wire loops) allow the notebook to fold back on itself 360 degrees and lay perfectly flat. The main trade-off is aesthetics—it looks less formal—and pages can sometimes tear at the punch holes if a user is not careful.
A Quick Comparison
To simplify the decision, here’s how the main methods stack up:
| Binding Method | Best For | Pros | Cons |
|---|---|---|---|
| Smyth-Sewn | Premium Journals, Hardcovers | Lays flat, extremely durable, high-end feel | Most expensive, complex process |
| Perfect Binding | Softcover Books, Notebooks | Cost-effective, clean square spine | Doesn’t lay flat, spine can break over time |
| Wire-O / Spiral | Planners, Manuals, Calendars | Lays flat, 360-degree fold-over | Pages can tear out, less formal look |
| Saddle-Stitch | Brochures, Zines, Inserts | Very inexpensive, fast to produce | Limited page count (usually under 64) |
Ultimately, the "perfect" method is the one that best serves your customer and your product’s purpose.
How to measure boards for book binding?
Have you ever received a hardcover sample where the cover overhangs the pages too much, or even worse, not enough? It’s a small detail, but it speaks volumes about quality. An incorrect overhang, or "square," looks unprofessional, leaves page corners vulnerable to damage, and can make the entire product feel cheap.
To measure boards for a case-bound (hardcover) book, start with your finished text block’s dimensions. The board height should be the text block height plus 6mm, creating a 3mm overhang on the top and bottom. The board width should be the text block width minus about 3mm. This subtraction allows the cover to hinge properly at the spine, ensuring a strong and functional binding with a classic, protective overhang.
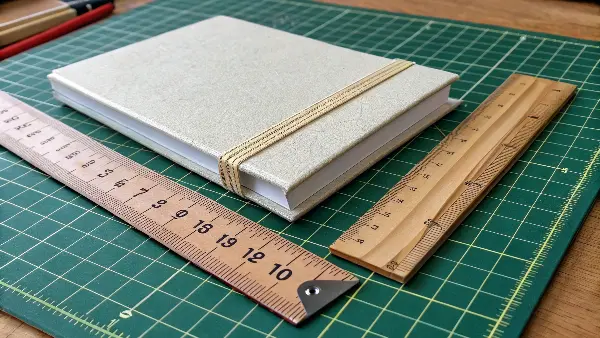
Getting the case specifications right is critical in my line of work. It’s one of those technical details that, if ignored, can lead to the rejection of an entire shipment. A well-made case not only protects the pages but also gives the book a balanced, high-quality feel in the hands. The formula is actually quite simple, but it’s essential that your supplier understands and adheres to it precisely. Let’s walk through how to calculate the dimensions for a perfect fit.
Calculating Your Cover Board Dimensions
First, you need to understand the two main components: the text block (the stack of sewn or glued pages, trimmed to its final size) and the case (the hardcover, made of two boards and a spine piece). The goal is to make a case that is slightly larger than the text block.
Here is the step-by-step formula I use when sending specifications to our manufacturing partners:
- Start with the Text Block: Measure the final, trimmed text block (Height x Width x Thickness). Let’s use a standard A5 notebook as an example: 210mm High x 148mm Wide x 15mm Thick.
- Calculate Board Height: The standard overhang, or "square," at the top and bottom is 3mm each.
- Formula:
Board Height = Text Block Height + 6mm - Example: 210mm + 6mm = 216mm
- Formula:
- Calculate Board Width: This one is less intuitive. The front and back boards do not extend all the way to the spine. A small gap is needed to form the hinge. Therefore, the board is slightly narrower than the text block.
- Formula:
Board Width = Text Block Width - 3mm(this can vary slightly, but 3mm is a good standard) - Example: 148mm – 3mm = 145mm
- Formula:
Don’t Forget the Spine Piece
The third piece of the case is the spine inlay. Its calculation is simple but essential. The width of this piece should match the thickness of your text block.
- Formula:
Spine Piece Width = Text Block Thickness - Example: 15mm
Here it is in a table for clarity:
| Component | Calculation | Example (Text Block: 210mm H x 148mm W x 15mm T) |
|---|---|---|
| Front/Back Board Height | Height + 6mm |
210mm + 6mm = 216mm |
| Front/Back Board Width | Width - 3mm |
148mm - 3mm = 145mm |
| Spine Piece Width | Text Block Thickness |
15mm |
Providing these exact measurements in your tech pack leaves no room for error and ensures your hardcover products have that clean, professional finish every time.
How much margin do you need for book binding?
You’ve approved a beautiful page layout, but when the first bound samples arrive, you see it: text and images are sinking into the center fold or sitting dangerously close to the trimmed edge. This is a classic, and frustrating, design flaw. Key content can get lost in the "gutter" or lopped off during trimming, ruining the user experience.
The margin needed for book binding depends entirely on the binding method. For perfect binding, a minimum inner margin (gutter) of 18-25mm is crucial, as the book doesn’t lay flat. For Smyth-sewn books, you can use a smaller gutter of 12-18mm. All outer margins (top, bottom, and side) should be at least 12mm to create a safe zone away from the trimming process and provide comfortable visual spacing.
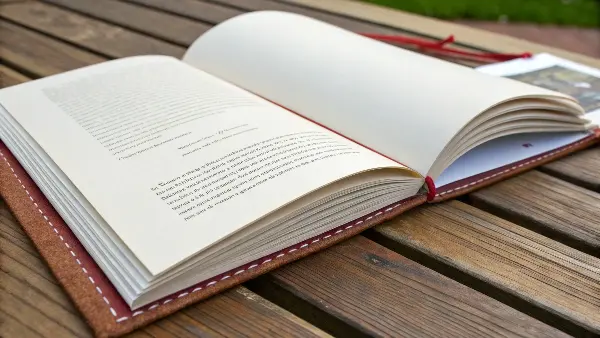
As a product manager, I know that function must follow form. A notebook is useless if you can’t comfortably write across the whole page. That’s why setting correct margin guidelines is just as important as choosing the cover material or paper weight. It’s a technical detail that directly impacts usability. Before we send any design to a manufacturer, we double-check the margins against the chosen binding type. It’s a simple step that prevents costly redesigns and ensures a professional result.
The "Gutter": Protecting Your Inner Margins
The inner margin, where the pages meet at the spine, is known as the gutter. This is the most critical margin to get right.
- Perfect Binding: Because these books don’t open completely flat, a significant portion of the page curves into the spine. If your gutter is too small, words will disappear into this curve, forcing the reader to flatten the spine and potentially break it. A generous gutter of 18mm or more is essential.
- Smyth-Sewn Binding: These books are designed to lay flat. The sewing allows the pages to open up almost completely, so you can get away with a tighter gutter, often around 12-15mm. This gives you more usable space on the page.
- Wire-O/Spiral Binding: Here, the space is taken up by the punch holes. You need to ensure all text and important design elements are clear of this area. A margin of at least 20mm on the binding side is a safe bet.
Safe Zones and Bleed: Outer Margins
The outer margins are about protecting your content from the trimming process. No matter how precise a factory’s guillotine is, there’s always a small variance. The area that could potentially be cut is the trim line.
- Safe Zone: All important text and images should be kept inside a "safe zone," typically at least 12mm from the final trimmed edge.
- Bleed: If you have images or colors that are meant to go right to the very edge of the page, you must extend them beyond the trim line by about 3mm. This extra area is called the bleed, and it ensures that even with a slight shift during trimming, you won’t have an ugly white border.
Here are my go-to margin recommendations:
| Binding Method | Recommended Inner Margin (Gutter) | Recommended Outer Margins (Safe Zone) |
|---|---|---|
| Perfect Binding | 18mm – 25mm | 12mm+ |
| Smyth-Sewn | 12mm – 18mm | 12mm+ |
| Wire-O / Spiral | 20mm (on binding side) | 12mm+ |
I always ask suppliers for a "dummy book"—an unprinted, bound sample. This lets me physically check the usable page area and margins before we approve a full production run. It has saved us from costly mistakes more than once.
Conclusion
Evaluating book binding quality goes far beyond a simple visual check. It requires understanding the different methods, the tools that shape the final product, and the precise measurements for both covers and internal page margins. This knowledge enables you to communicate your needs clearly, collaborate effectively with suppliers, and consistently source high-quality stationery for your brand.

